Ngram
The Ngram plugin allows you to generate ngrams using items in your Omeka Classic installation. A corpus is generated from the contents of your selected text element field. Corpora may then be investigated via ngram graphs, counts, and frequencies.
For additional information on ngrams, please see:
A corpus is drawn from the items in your collection with content in a particular text element (selected on the plugin configuration page). You can then narrow the items with a Search Query, producing an "Item Pool". The Item Pool will be used to create the Corpus, by validating the items. You can choose a second metadata field for the Sequence, and the plugin will assess which items have usable data in both fields. You can then modify item metadata as necessary to include more or fewer items.
Finally, the corpus is used to generate unigrams, bigrams, and/or trigrams for analysis. Graphs can be displayed if you set a sequence element such as a date field.
Your results will be more meaningful when you are working with clean data. Before you begin, ensure that the formatting of your data fields (in particular, those that include numeric sequences like dates) are consistent. The plugin screens can also help you identify items in need of cleanup.
System requirements
The Ngram plugin requires the following libraries and dependencies:
- IntlBreakIterator class (in your PHP)
- Make sure your PHP path is properly configured.
Configuration
Once you’ve installed it on your site, configure the plugin from the Plugins tab at the top of the administrative screens.
There are two configuration features for the Ngram plugin:
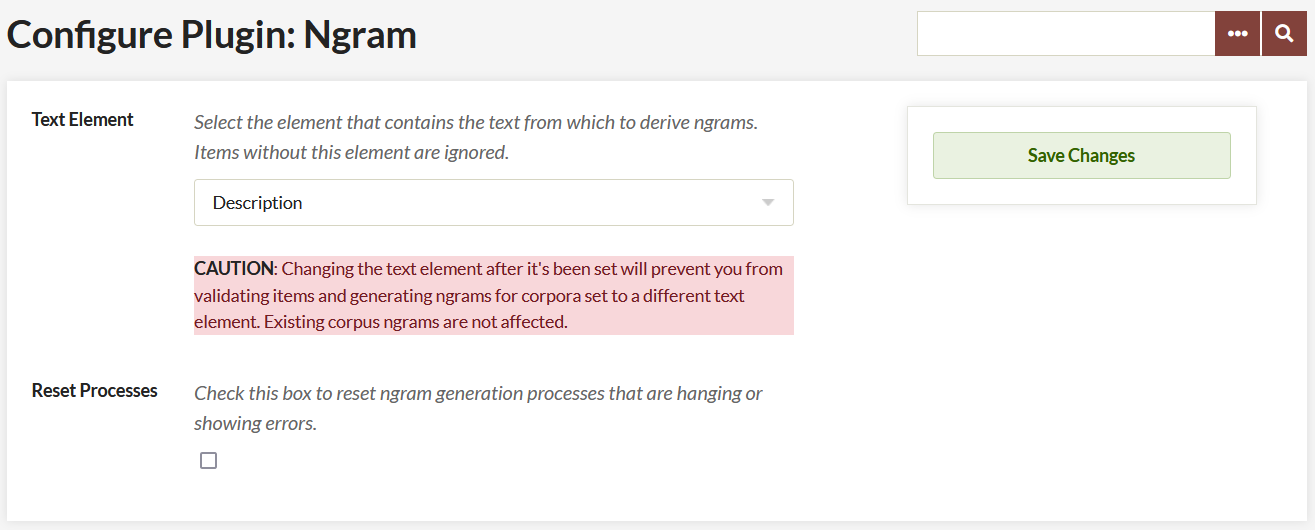
Text Element: a dropdown menu from which you may select one text element to create an ngram corpus.
In order to produce an ngram, the plugin must be directed to a particular text element. For best results, choose a Text Element by reviewing items within your collection and identify a text field that is meaningful across multiple items.
Text Elements are listed in a dropdown menu. Note that you cannot choose the "Text" field created by the PDF Text plugin when a text layer is extracted from a PDF file upon ingest.
If you have created unique metadata categories for your collection, these will also be available for selection in the dropdown. You can only select a single element at a time. This means you cannot produce a single ngram corpus from multiple text fields.
For example, a user might choose to examine a collection of items with useful text in the Description field. Configuring the Text Element to the Description field directs the plugin to create a corpus that includes all items with text in that element. Items that do not have content in this text element will be ignored.
You may select different text elements for different corpora. However, do not modify the Text Element setting while you are in the process of validating items and generating ngrams for a corpus! Doing so will break that process. Only change this once you have generated all ngrams for a corpus.
Reset processes: a checkbox that will reset any ongoing processes that are hanging or showing errors.
Be sure to save your changes to this page.
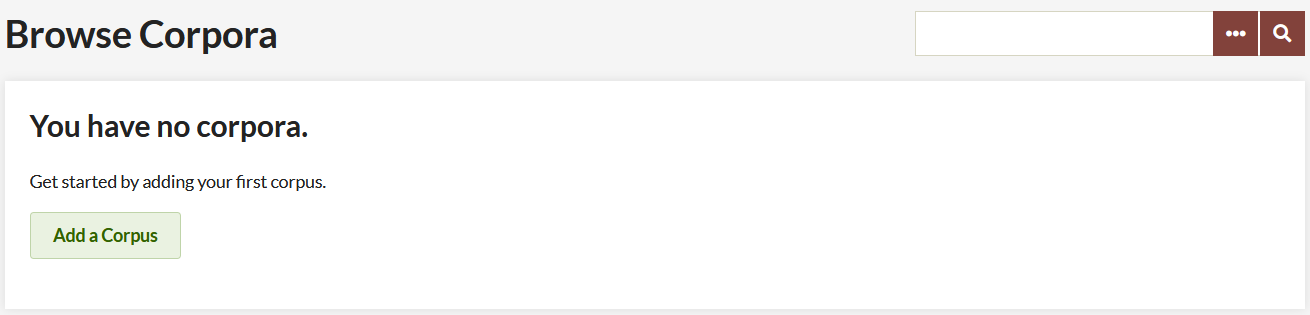
Add a corpus
To create a corpus and start viewing ngrams, go to the Ngram tab on the left hand navigation of your Omeka admin dashboard. On the Browse Corpora page, click the green "Add a Corpus" button.
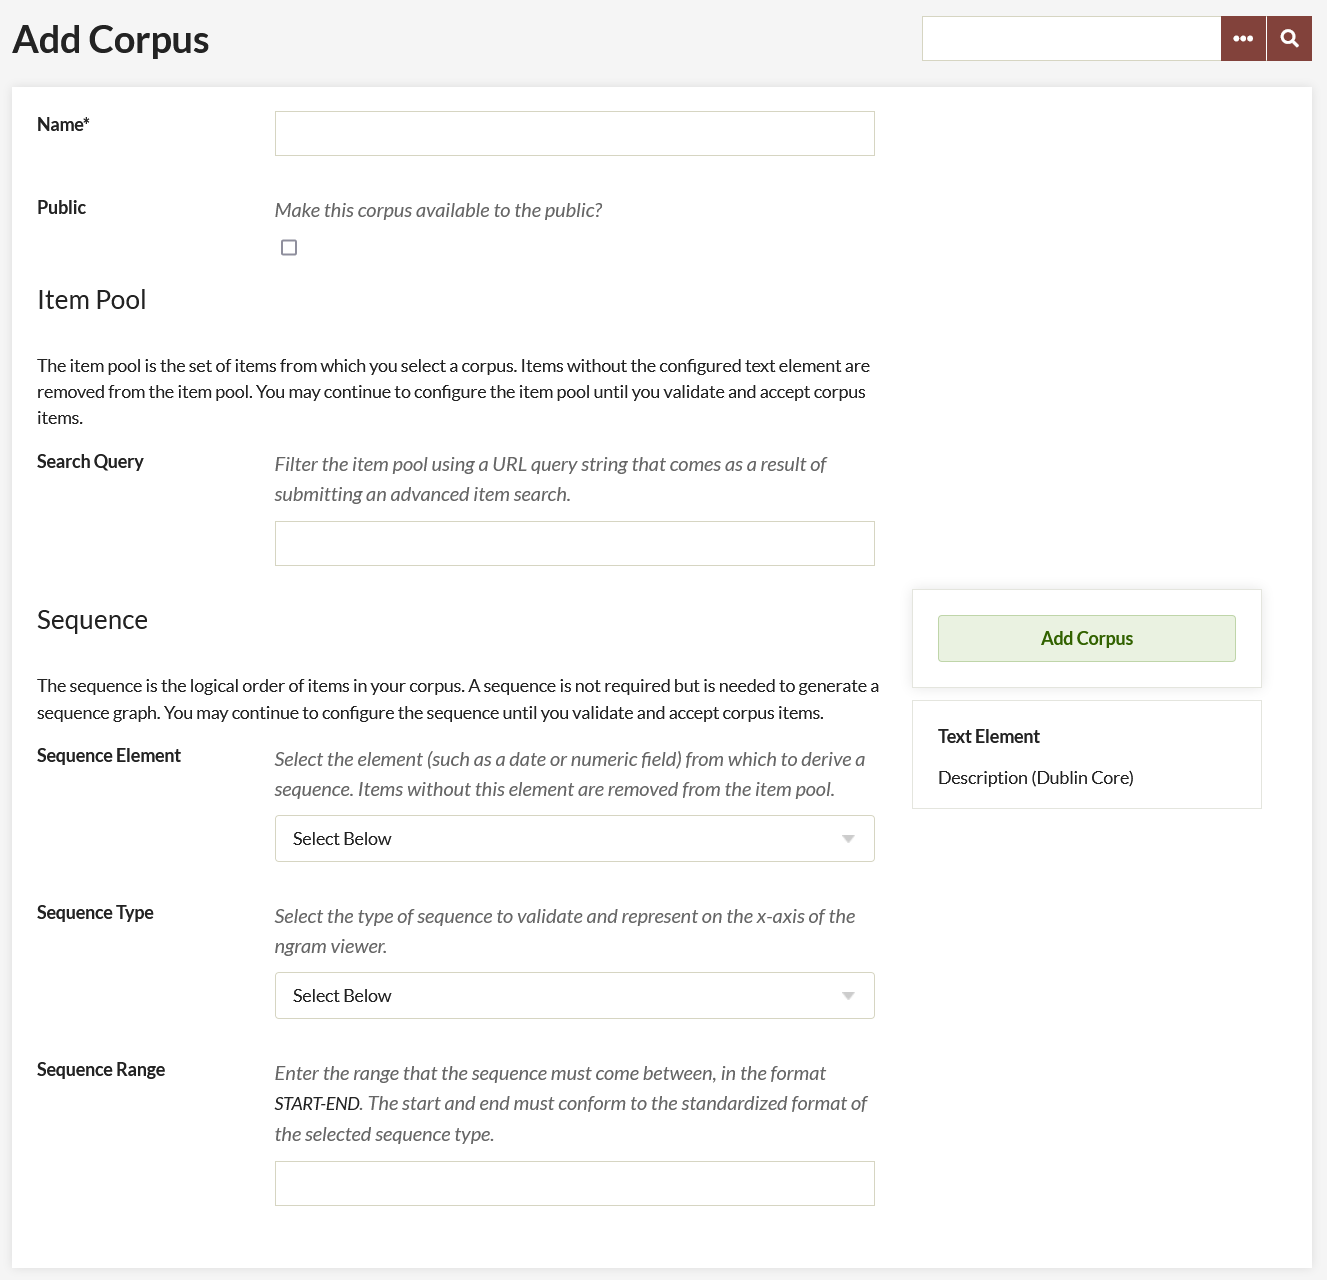
On the "Add a Corpus" page, complete the following options:
Name: Give the corpus a name. Remember that you may change the analyzed metadata element in the future, so we recommend including the element name and other identifying information such as any filters added through search queries.
Public: Click the checkbox to make the corpus visible on the public site.
Search Query: Narrow your corpus by inputting a search query. The best way to get this search query is to perform an advanced search of the items in your collection on the administrative side of your Omeka site. Then, copy and paste the entire URL of the results, after the part that reads admin/items/browse?.
Sequence:
A sequence will allow you to organize your ngrams visually. You do not have to have a sequence, but without one you cannot generate graphs.
- Sequence Element: Choose an element with numeric or date input, something that can be sorted chronologically or ordinally. Items without the selected element field filled in (for instance, an item without a date) will not be included in the corpus. For best results, choose a field with very clean and structured metadata.
- Sequence Type: choose from Date by Year, Date by Month, Date by Day, or Numeric Sequence Range. The field will prompt you with the proper format for the sequence if you choose a Date type. If numeric, make sure the format matches the numeric sequence of the elements you’re drawing from. Sequence Range: Date should be entered in the Year(-Month-[Day]) format and should be entered as a range, for instance, "20010101-20160101".
When you have completed adding your corpus, click the green "Add Corpus" button.
Manage your corpus
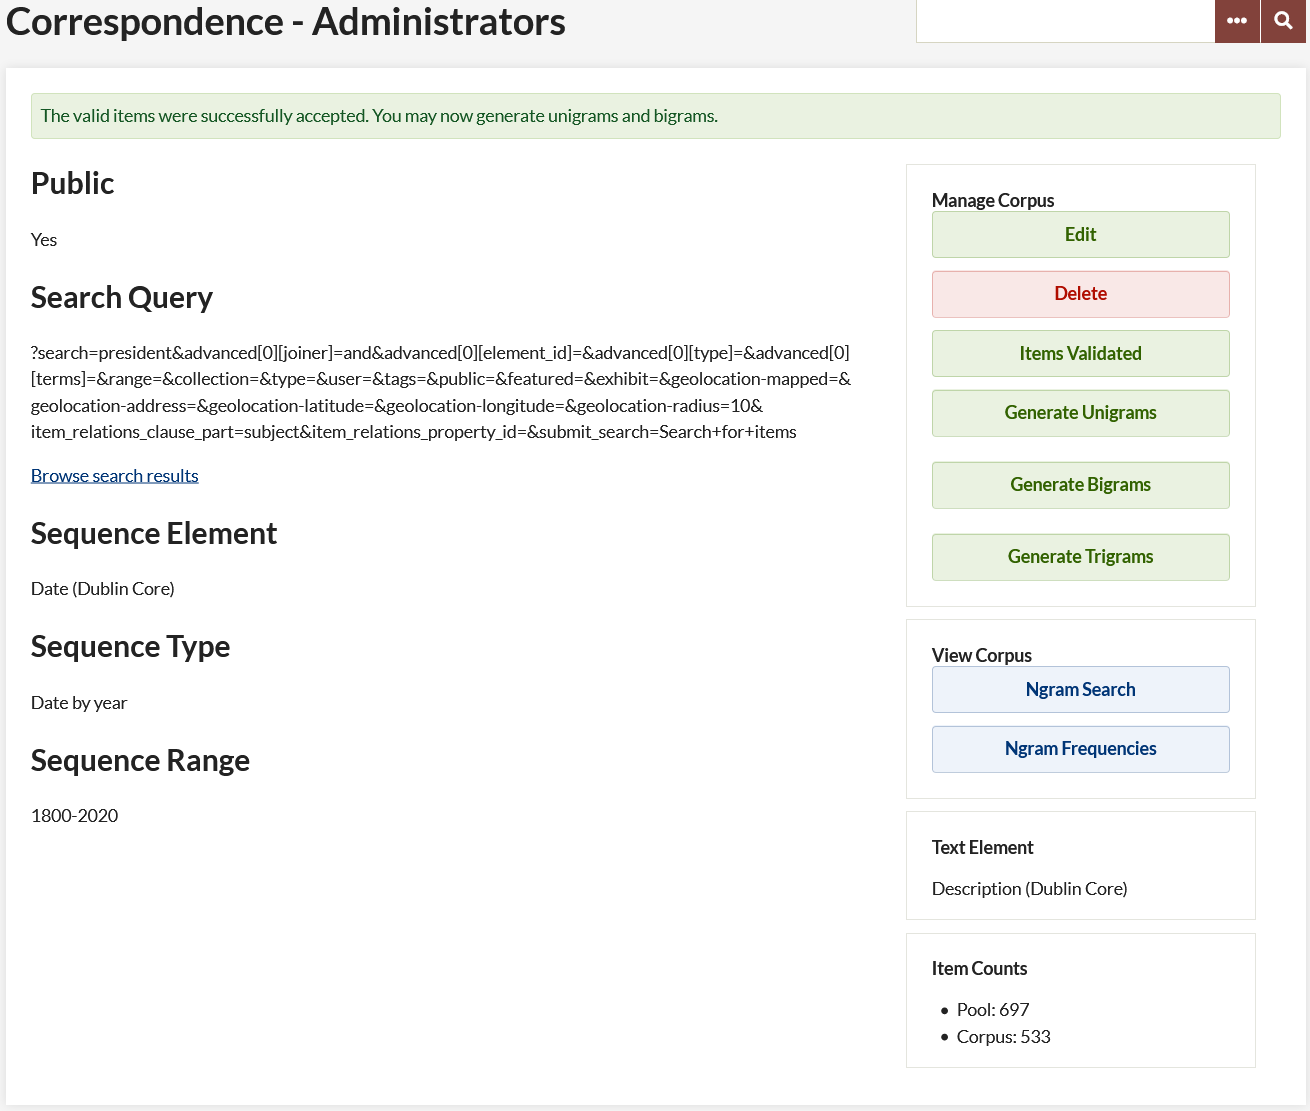
After you have added a corpus, the screen will update with information and options for that corpus.
On the left the elements that were input on the "Add Corpus" screen are listed:
- Public
- Search Query, with a "Browse search results" link
- Sequence Element
- Sequence Range.
You can click "Browse search results" to open a Browse Items page with all the items that are currently included in this corpus.
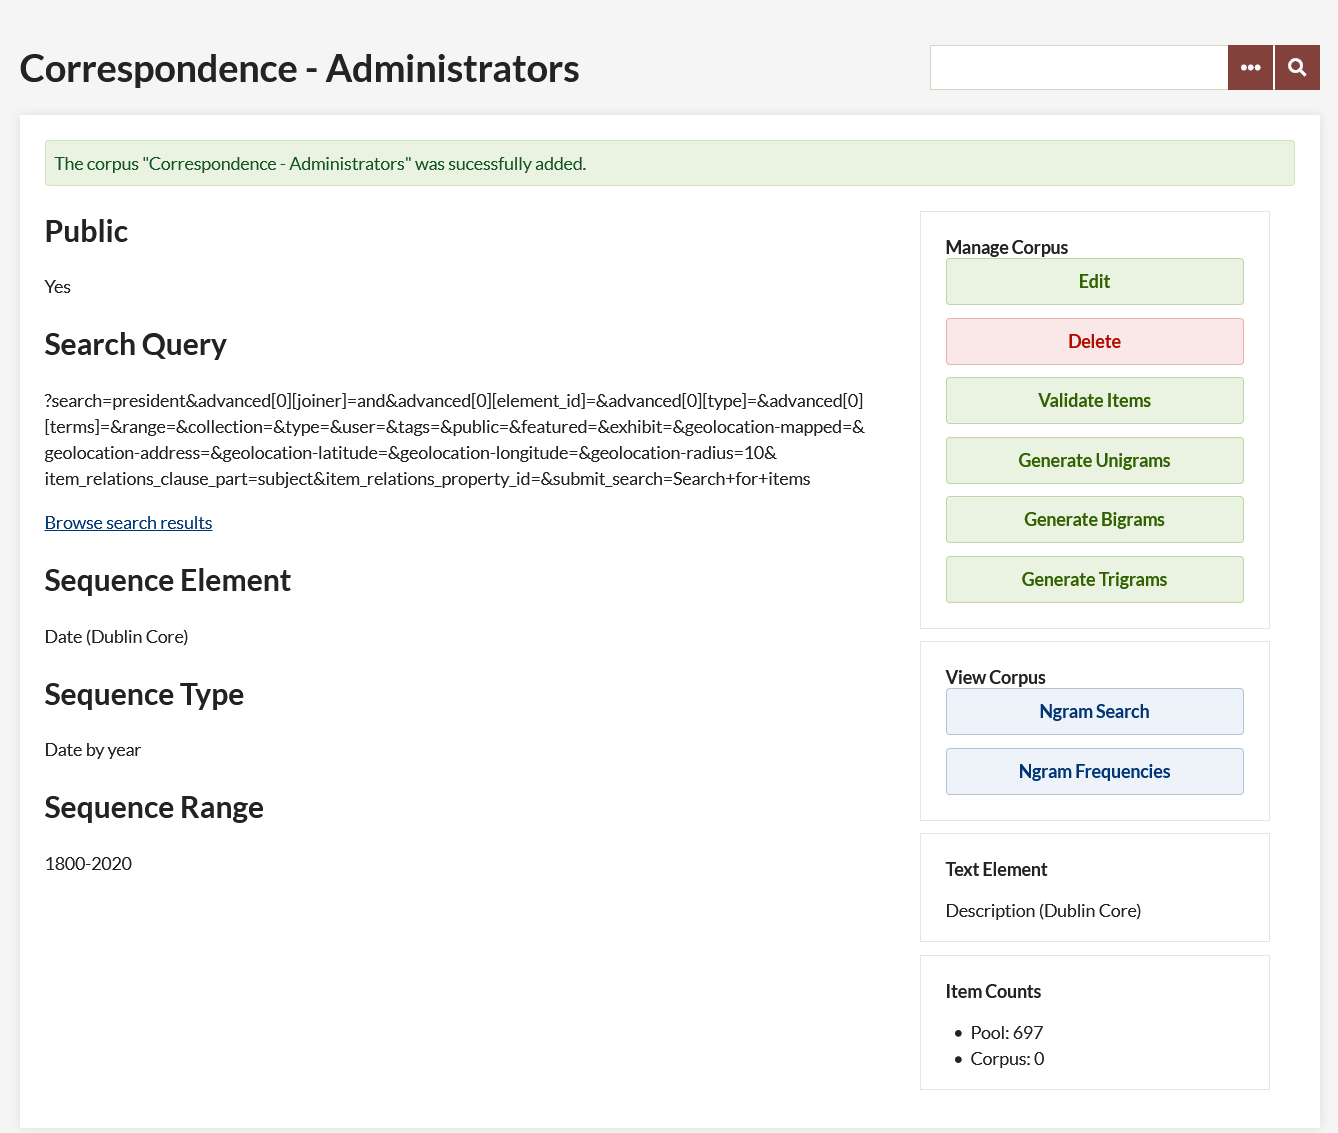
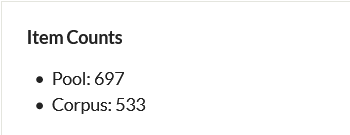
On the right, buttons allow the user to Edit and Delete the corpus, and "Validate Items". After you have validated items, buttons here allow you to generate unigrams, bigrams, and trigrams, and to view the corpus. Below, a small panel indicates the Text Element for the corpus. At the bottom, an Item Counts section indicates the pool of items from which this corpus may be derived.
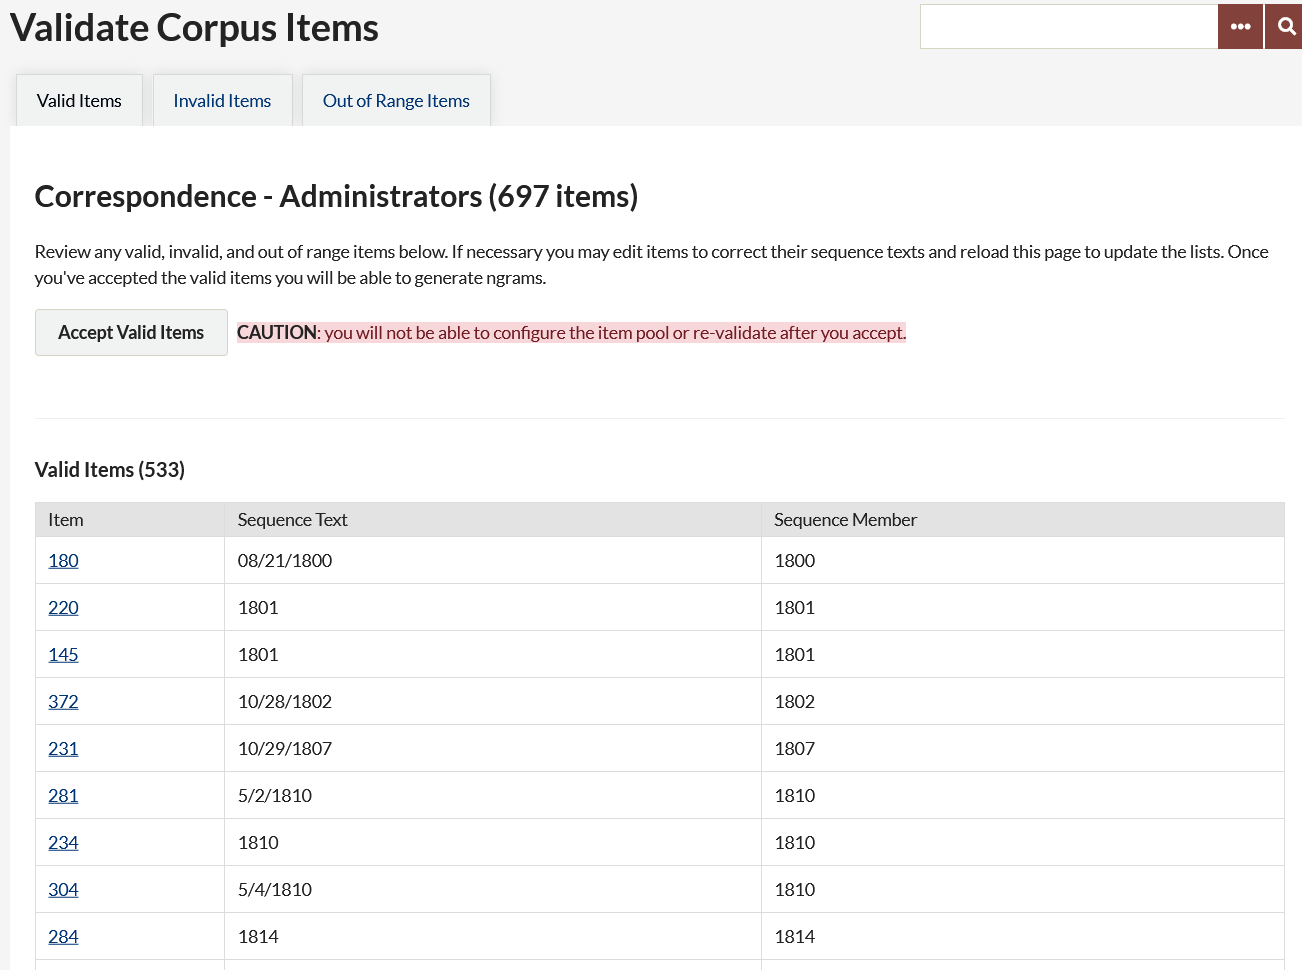
Validate the items
After the Corpus has been created you must validate the set of items before you can generate ngrams and view frequencies. To do so, click the green "Validate Items" button on the right-hand side (just below the Delete button).
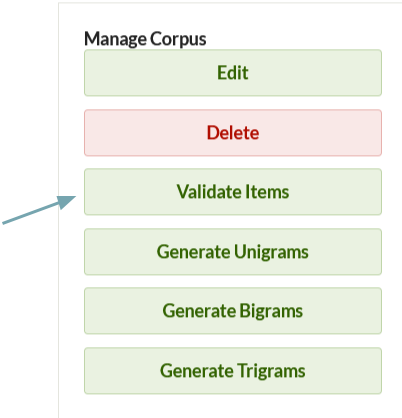
This will take you to a new screen with three tabs: valid items, invalid items, and out of range items.
Valid items are those items with sequence text that is readable to the plugin. The table on this tab displays:
- the item number (a link to the item),
- the text in the sequence element, and
- Sequence member, or how it will be used in sequence by the plugin, e.g. when the sequence is “Date by Year” and a year has been recognized in the date field and sorted. Note that the year will be recognized in a "Year-Month-Day" date value, including a value using hyphens (-) and slashes (/) between each number, and including "Day/Month/Year" and other formats.
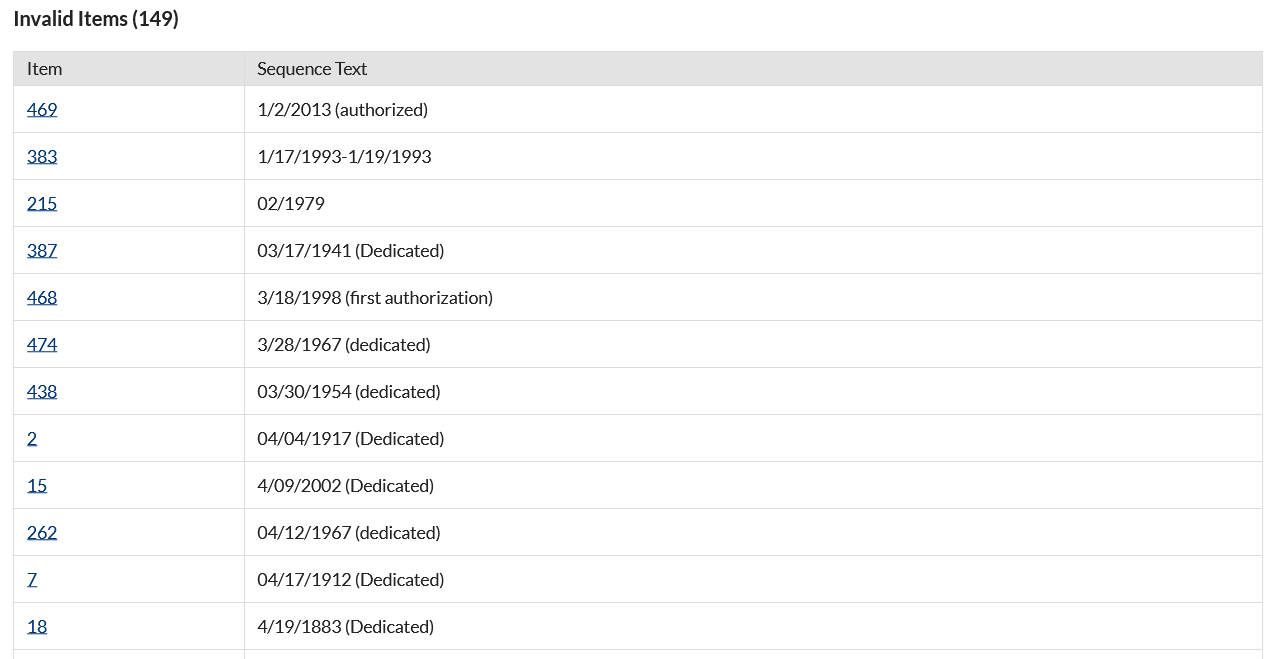
Invalid items have content in the sequence element which the plugin cannot parse. You can click on the Item ID number to edit the item and correct the element text. For example, dates may have textual values such as "circa XXXX" and "XXXX or later" that need to be removed for the item to be included in the corpus. If you do not wish to lose this textual information, do not edit the item.
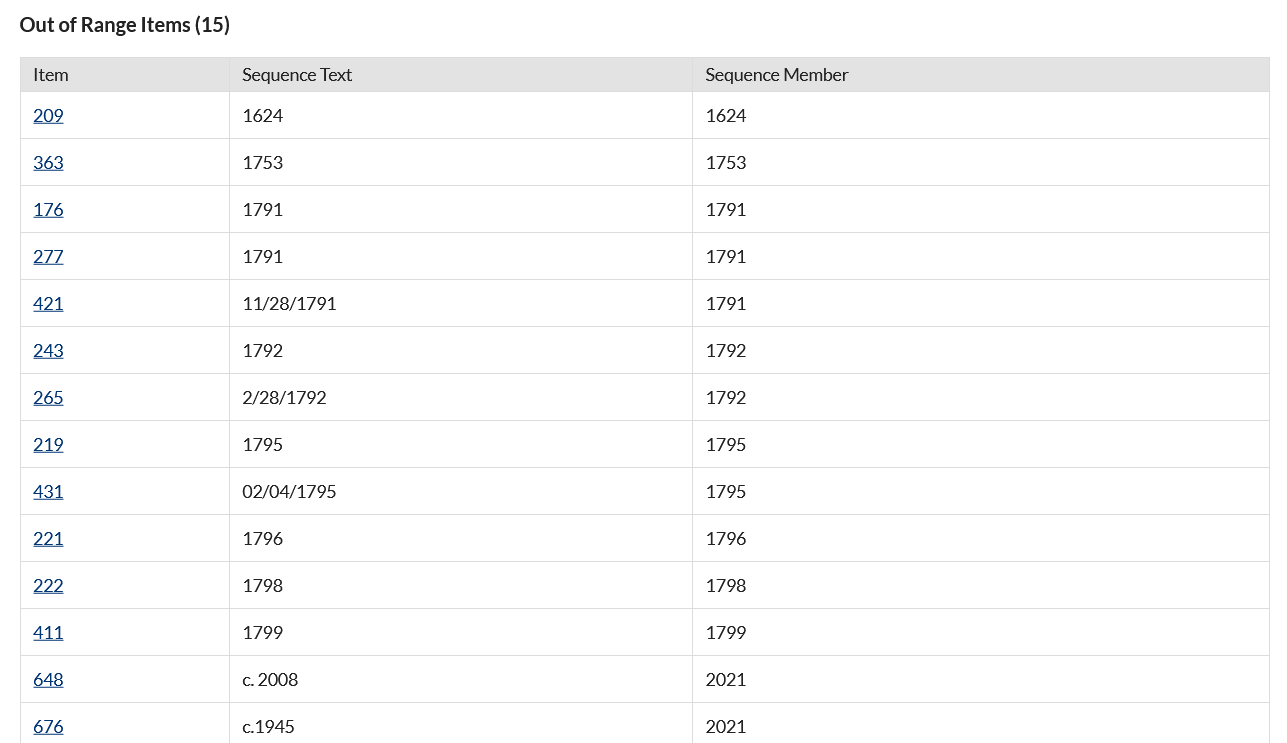
Out of range items have a recognized value in their sequence element which is outside the range you set (such as the year 1624, outside the range of 1800-2020). The table on this tab displays:
- the item number (a link to the item),
- the text in the sequence element, and
- Sequence member, or the information recognized as being in-sequence but out-of-range.
Utilize the linked item number to modify the items you wish to have included. Alternatively, you can go back and modify the range you set, using the "Edit" button.
For ease of navigation, you may click to open a new tab for the invalid or out of range items you would like to modify. Refresh the list of valid and invalid items by reloading this page. Once you are done correcting invalid items, or the list of valid items looks correct, click the green "Accept Valid Items" button.
Once you click the "Accept Valid Items" button you will not be able to reconfigure the item pool or reset the body of valid items. This is permanent - you will no longer be able to edit the corpus or change the range, etc. To start fresh (such as when new items are added to your Omeka Classic site) you will need to start a new Ngram project.
After you have validated your items, the Item Counts pane will update to provide a count of the number of items in your corpus.
Generate ngrams
After you have validated your items, click the buttons to generate unigrams (single words), bigrams (two word pairs), and trigrams (three word groups). You can only do one at a time. Refresh the page to see if the process is complete - larger corpora will take longer to process. While the ngrams are processing, these buttons will be grey and text will update to indicate which process is “In Progress.” When complete, the text will update to read “Generated.”
You do not have to generate unigrams, bigrams, and trigrams in order to use the View Corpus functions. However, running all three processes before you view corpus will give you more options when analyzing the corpus.
Note: It is only possible to generate one corpus at a time.
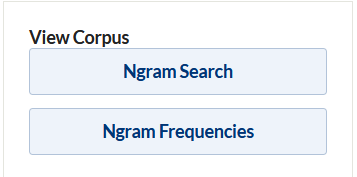
View your corpus
Once you have created a corpus, validated the items, and generated ngrams, you can view the corpus in two ways: Ngram Search and Ngram Frequency.
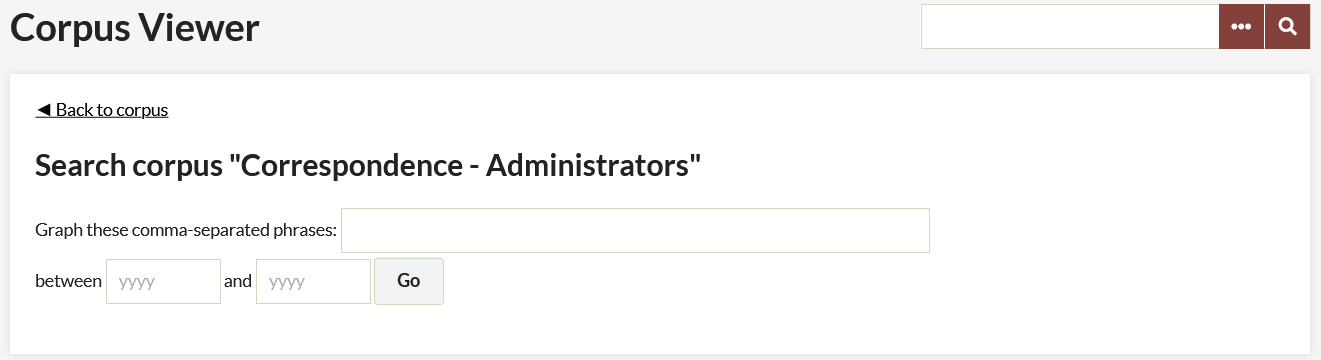
In order to get back to the Corpus summary page from the Corpus viewer, click the “back to Corpus” button just under the label Corpus viewer.
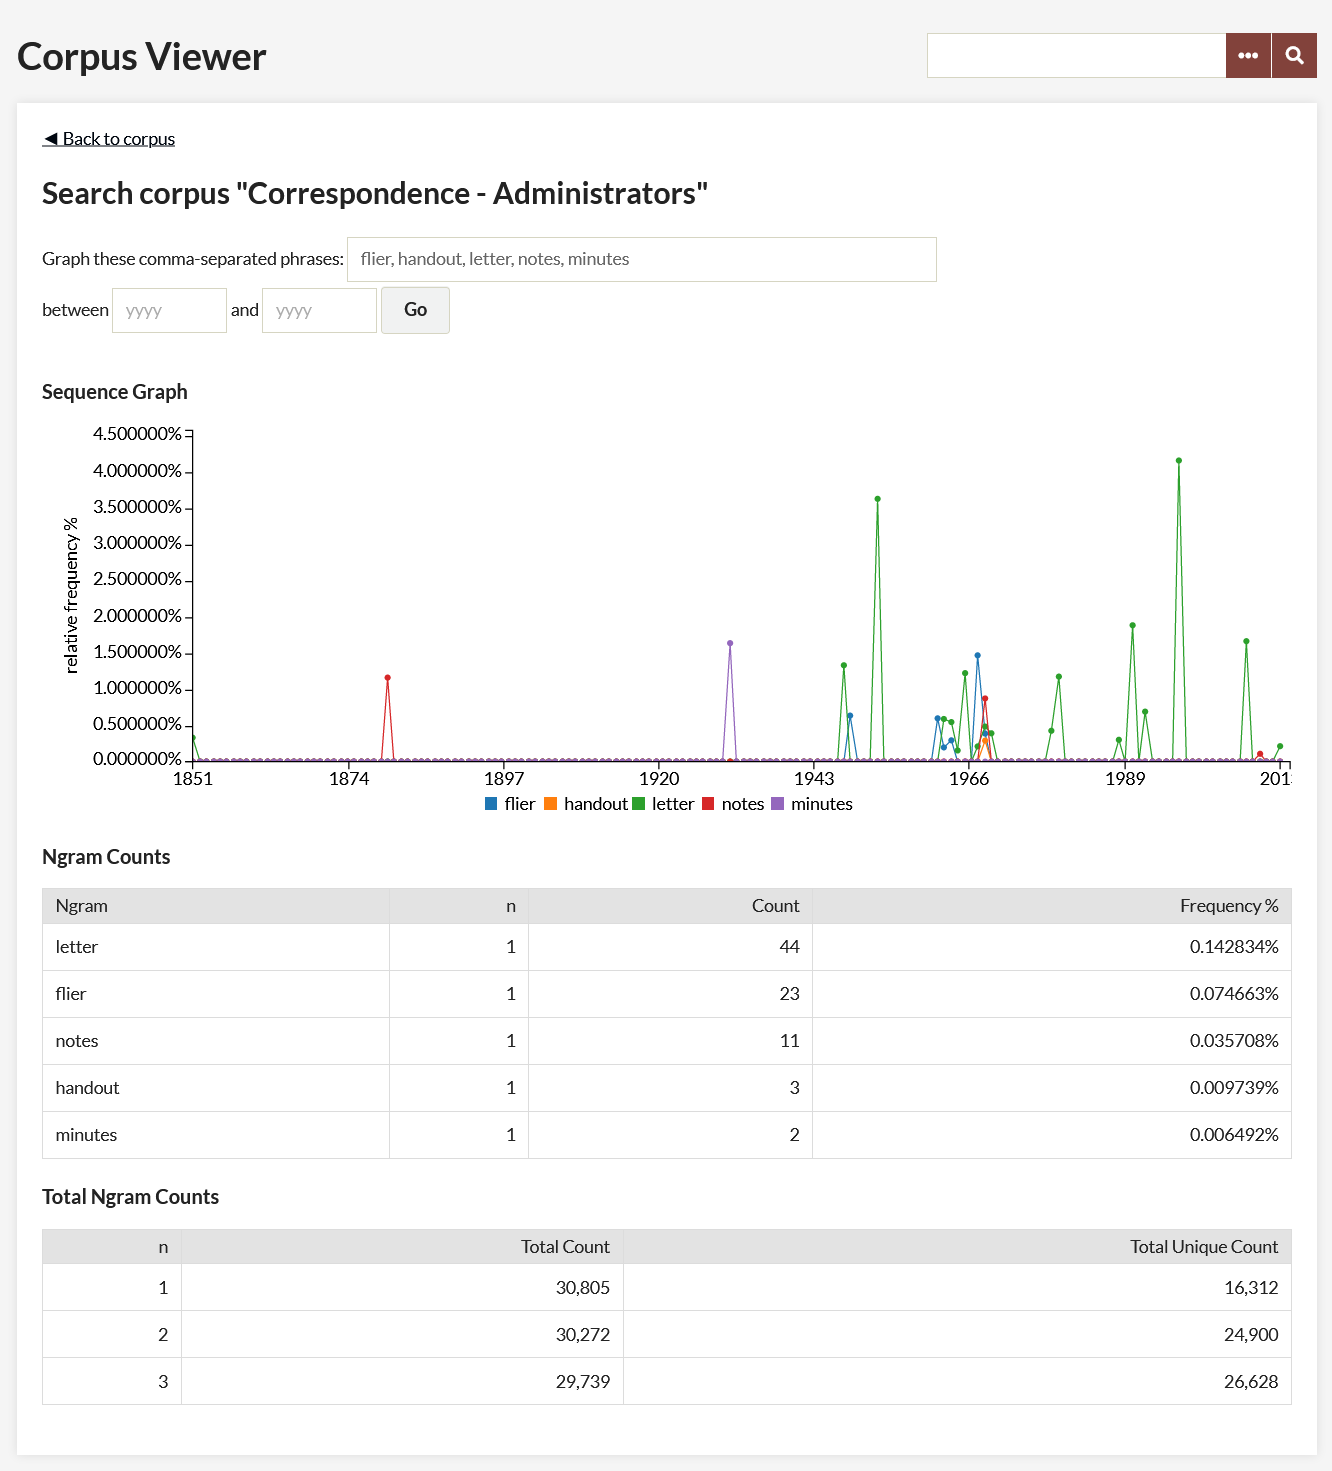
Ngram Search - Using the text field, enter comma-separated phrases or words to graph frequency across the corpus.
Note: You can only search for two word phrases if you have generated bigrams, etc.
You can, if you want, specify a range for the corpus search. Note that the format of the range you search must match exactly the format of your sequence data. So if you have sequenced the corpus by year, enter a four digit year, whereas if you have done it by month you must enter yyyymm formatted range data.
The results should return a sequence graph (if they do not, check the formatting of the range data), along with a table showing Ngram Counts and Total Ngram Counts.
Sequence Graph: Hovering over points on the sequence graph produces a small chart containing data that includes;
- time period
- ngram
- percentage of the ngram in the corpus for a particular time period.
Ngram Counts: This chart includes information about the ngrams in the corpus.
- ngram: the phrases or words used to produce the sequence graph.
- n: number of words in the ngram phrase.
- Count: total number of that ngram in the corpus.
- Frequency %: percentage of the ngram in the entire corpus.
Total Ngram Counts: This chart includes information about the corpus.
- n: the number of words/phrases in an ngram.
- Total Count: the number of unigrams, bigrams, trigrams in the corpus.
- Total Unique Count: the number of unique ngrams within the unigrams, bigrams, trigrams.
Note: These results reflect the composition of the selected corpus (which has been filtered by text element and search query), not the entirety of your collection.
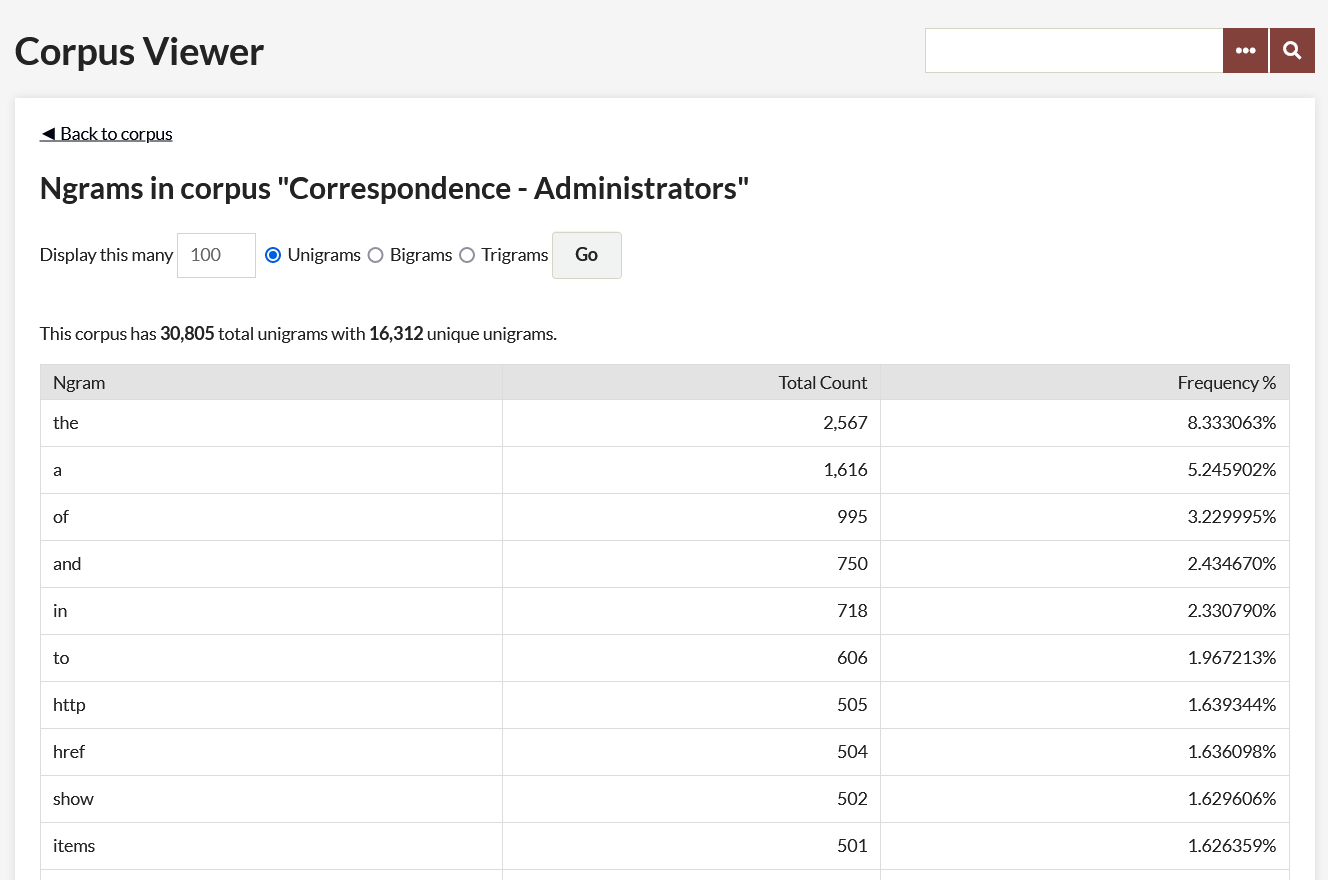
Ngram Frequency - The Ngram Frequency Corpus view returns ngrams in order of frequency.
Enter the number of results you want to return of unigram, bigrams, or trigrams (select one using the radio button). By default the number of results is set to 100.
Clicking the Go button produces frequency information, including; the total number and unique number of unigrams/bigrams/trigrams, and a chart that displays the ngram, total count, and a frequency percentage.
Note that the ngram plugin does not strip out stop words (a, the, of, for example) so depending on the content of the element that is forming your corpus you may want to enter a larger number in order to return useful results.
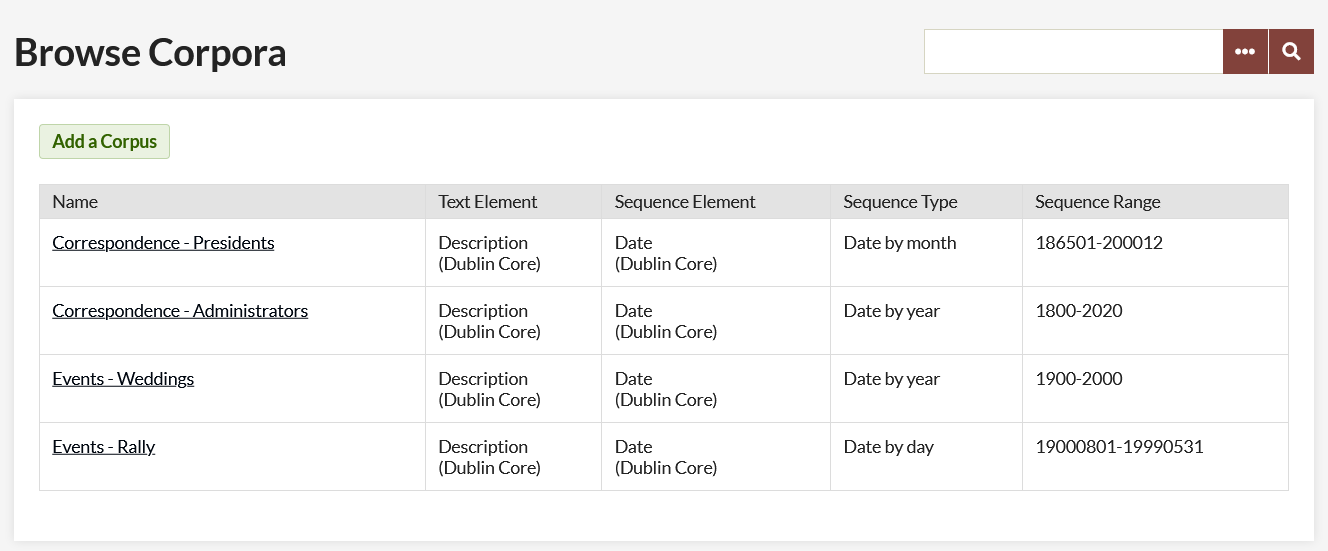
Browse corpora
Once you have at least one corpus, the page at admin/ngram/corpora (the ngram tab) will display a table of your corpora with the following information for each:
- Name (that you give it)
- Text Element being used as the source of the corpus data, with element set in parentheses
- Sequence Element, with element set in parentheses
- Sequence Type
- Sequence Range
Case studies
The following case studies examine the Text Analysis and Ngram plugins using data from the September 11 Digital Archive.