Working with Plugins
Plugins are tools to extend the basic functionality of Omeka Classic based on each individual installation's needs. A list of plugins available for download is on the Plugins Directory. This list includes both plugins built and maintained by the Omeka Team, and plugins made and submitted by our users. Specific instructions are available on each plugin's documentation page, whether in this manual (for our Team plugins) or at the links provided by each user-built plugin.
The Omeka Team cannot guarantee that user-built plugins work as expected, and do not maintain these plugins or update them when needed.
Note
Not every plugin will work with every version of Omeka, especially newer plugins on old installations. Older versions of plugins may be available on their Github pages. Use the Plugins Directory to find the "Github" link on the right side of the screen for each plugin, then look on the right hand side of the Github page for the "Releases" section.
Manage plugins from the Plugins page found at the top of your administrative dashboard. Note that only Super-level users have access to the Plugins page, so any plugin functionality configured from this menu can only be done by Super accounts.
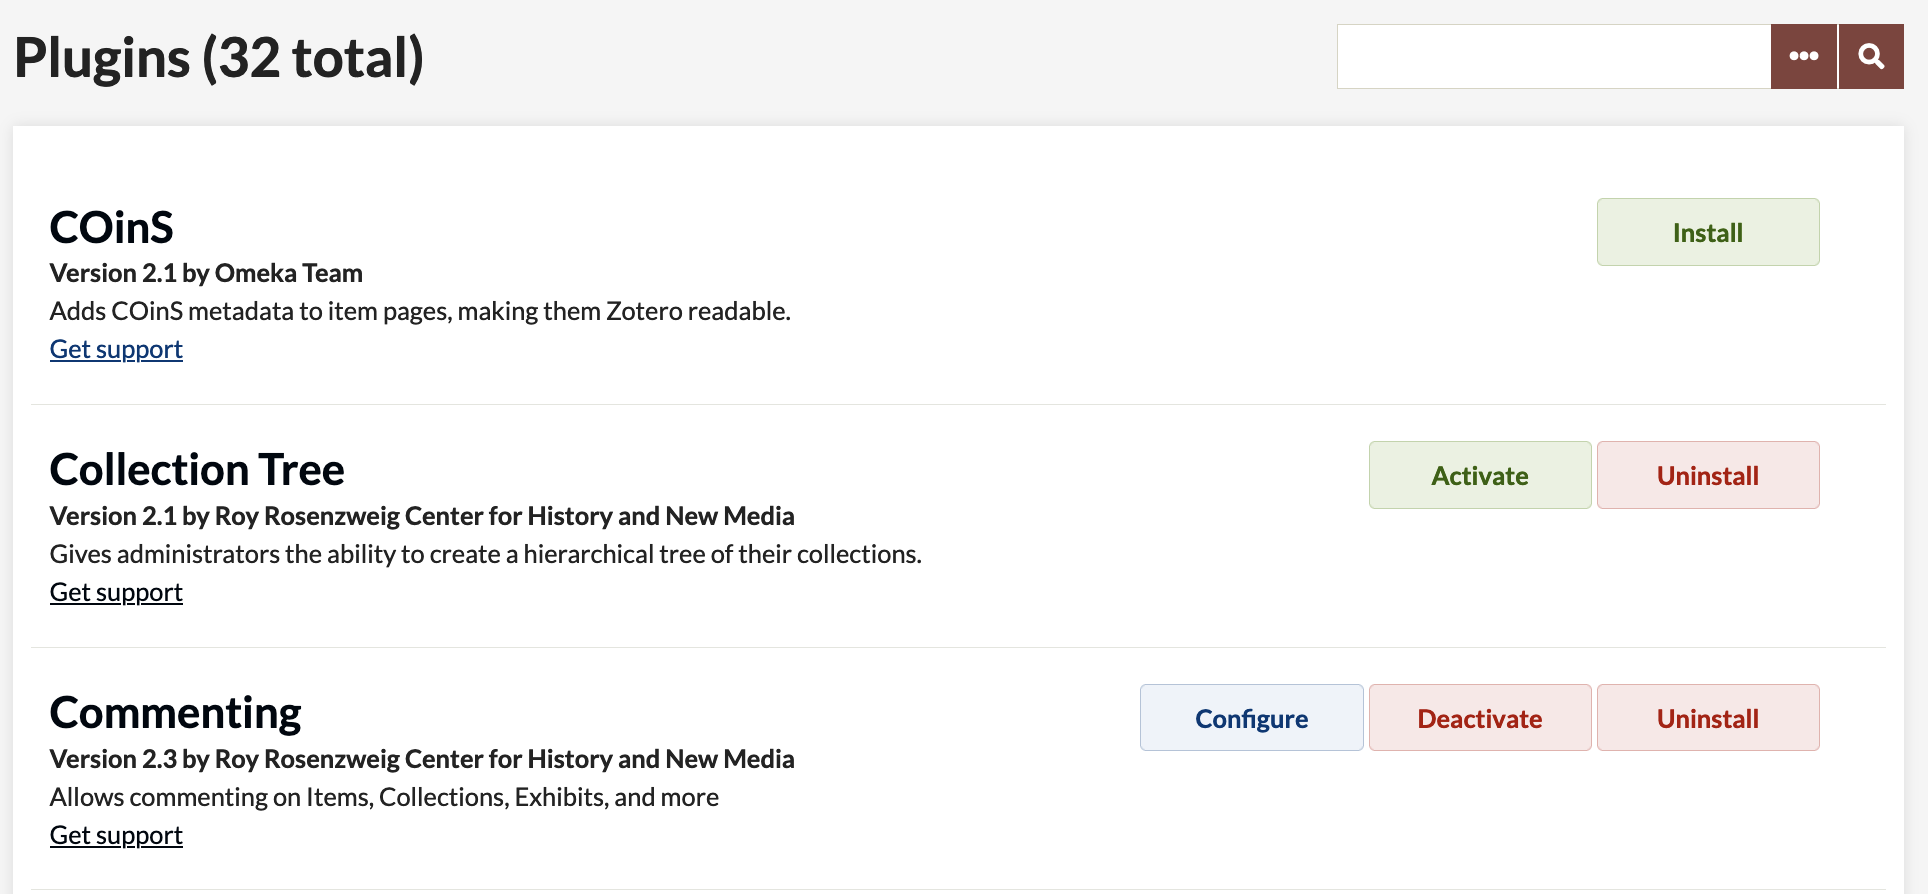
Plugins will be listed alphabetically. Each plugin listed will have links to perform various actions:
- Install: Run the installer and activate the plugin.
- Configure: If applicable, a page for setting up the plugin and/or customizing its settings.
- Deactivate: Deactivating merely "unplugs" the plugin, but does not delete any data collected while the plugin was active.
- Activate: Activates the plugin after it has been manually deactivated. All plugins are automatically activated once installed.
- Uninstall: Runs the uninstaller for the plugin and deletes information in your installation database related to the plugin, including content in metadata fields.
In some cases, uninstalling plugins can delete data associated with the plugin from your database, such as information entered into metadata fields on items or collections. Check the plugin's documentation. We recommend deactivating and testing changes first, before fully uninstalling.
Install a plugin
To add and activate a new plugin for your Omeka installation, follow these steps:
- Download and unzip the compressed plugin file on your computer.
- Open your FTP client and use your FTP login info to access your site. Or, if you are using cPanel File Manager, WebFTP, or another in-browser tool, log in there.
- Navigate to your Omeka folder (it should have the same name as your Omeka install), open it, then open the
/pluginsfolder. - Locate the plugin folder on your computer and upload it into your Omeka website's
/pluginsfolder.- Sometimes the plugin unzips into a folder of the same name, so make sure to go inside it and upload the folder that only contains the plugin name, not the version number. For example, you may have downloaded the
CSSEditor-1.1.zipfile and extracted it to aCSSEditor-1.1folder, which contains aCSSEditorfolder. Upload theCSSEditorfolder. -- You may also be able, or required, to upload the zipped file and unzip it in place, if your tool does not allow you to upload a folder. Remember to watch for an extra folder level in this case.
- Sometimes the plugin unzips into a folder of the same name, so make sure to go inside it and upload the folder that only contains the plugin name, not the version number. For example, you may have downloaded the
- In another browser window, log in to your Omeka admin panel (
https://youromekasite.org/admin). - Navigate to the Plugins tab in the upper navigation of the admin dashboard, and scroll down to find the plugin you uploaded. Plugins are listed alphabetically.
- If the plugin is not visible, double-check that the folder is in the right location ('/plugins') and that the folder name is correct, including ensuring that the folder does not start with 'plugin-'.
- Click “Install” to the right of the plugin name to finish the process.
- Click “Configure” if available/needed.
- Read the documentation for the plugin to understand what configuration options are available.
If you are using a hosting provider that offers cPanel and online file management options, Reclaim Hosting has step-by-step instructions for uploading plugins with cPanel's browser-based FTP option.
You can watch our screencast showing these steps.
Note
You can also use git clone or the Github interface to download the latest plugin code directly from Github into a folder in your /plugins folder. Be sure to watch for extra folder levels or incorrect folder names in this case, such as a folder starting with plugin- or ending with -master. Rename the folder to remove things like plugin- and/or -master from the folder name, as in git clone https://github.com/omeka/plugin-Timeline.git Timeline.
Upgrade
When an active plugin is out of date, a notification will appear at the bottom of the plugin's entry on your Plugins page. The notification reads "A new version of this plugin is available. Get the new version." with a link.
Clicking the phrase "Get the new version" will take you to a page where you can download the latest version of the plugin.

You will upgrade by replacing the old plugin folder with the new one:
- Go to the admin dashboard of your Omeka site and navigate to the Plugins tab on the top navigation menu.
- Click the "Deactivate" button to deactivate the plugin you would like to upgrade. Warning: Do not click the uninstall button, or you may delete data associated with the plugin.
- Download the new version of the plugin, and unzip it on your computer.
- Open your FTP client and use your FTP login info to access your site, or use cPanel's file manager, or your WebFTP interface, etc.
- Navigate to your Omeka folder online, then open the
/pluginsfolder. - Delete the old plugin folder from your
/pluginsfolder. You can move it out of that location or rename if you wish to keep it, just in case. - Upload the new version of the plugin to the
/pluginsfolder. Be careful, as above, to ensure the folder name is correct. - Go to the admin dashboard of your Omeka site and navigate to the Plugins tab on the top navigation menu.
- Find your plugin in the list. You should be directed to upgrade the plugin - click the "Upgrade" button to complete the process.
If you have installed the plugin with git clone, do not use these instructions. You should update the plugin using git pull.
Plugin dependencies
Some plugins provide infrastructural functions for other plugins. These plugins are required to be installed and active for other plugins that depend on them to work. If you upload a plugin to your site but cannot activate it due to a message like this, simply install the required plugin following the usual steps above.

Pre-packaged plugins
The following plugins come pre-packaged with every installation of Omeka Classic:
- Coins – Adds COinS metadata to items on the admin theme and in public themes.
- Simple Pages – Publish static pages on your public site.
- Exhibit Builder – Build narratives around your collections.