Persistent Identifiers
The Persistent Identifiers module allows users to create or import persistent identifiers (PIDs) and assign them to Omeka S items. These PIDs can be made ("minted") and assigned at item creation, via the item editing screen, or during batch edits. They can be removed individually or in batches. Existing PIDs may be extracted from item metadata.
Once assigned, accessing an item's PID in-browser resolves to a stable, non-site-specific landing page containing the item's metadata, media, and any sites the item is assigned to.
The current PID services available in this module are:
- Archival Resource Keys (ARKs), minted within Omeka
- Digital Object Identifiers (DOIs), minted and managed by DataCite
- Archival Resource Keys (ARKs), minted and managed by EZID (for existing users only).
Note
This module was originally built to use the EZID service to mint and manage Archival Resource Keys (ARKs). EZID is not currently taking new members. This module, starting in version 1.2, generates and stores ARKs locally. Current EZID users can continue to use their accounts; new ARK users need to request a (free) Name Assigning Authority Number (NAAN) using the Ark Alliance's NAAN request form and enter it into Omeka.
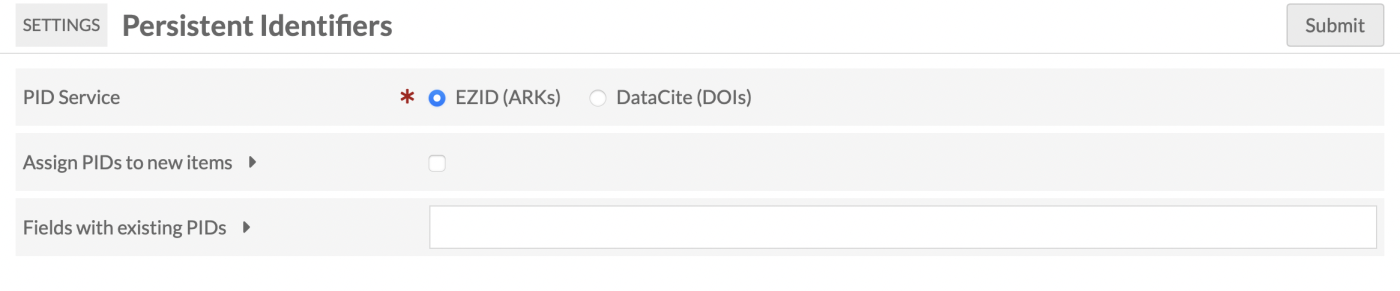
General settings
After installation, Persistent Identifiers will appear in the left-hand navigation in the "Modules" section. This link is available to users at the Global Admin and Supervisor levels.
The "Settings" page found here contains general settings:
- PID Service: Select which of the available PID services to use for minting or extraction. Only one PID service may be used at a time to mint and assign PIDs to items.
- Assign PIDs to new items: Check this box to apply automatically to every new item in Omeka S, whether it is created in Omeka S or imported. This will either newly mint PIDs or extract existing PIDs and assign them, depending on your settings.
- Fields with existing PIDs: A list of metadata fields that may contain PID values. When an item is created or imported, the module will check these fields for PIDs. If found, the existing PID will be assigned to the item (instead of generating a new PID). Use the format
dcterms:identifier,bibframe:identifier, etc. - Optional field to store PIDs: If set, the PID will also be written to this metadata property on each applicable item when generated or found.
Note
Depending on your settings above, you should adjust your and other users' workflow: when creating an item, be sure to enter the existing PID before you save the first time. You may wish to keep "Assign PIDs to new items" turned off except in special circumstances. Remember that users lower than "Supervisor" will not have access to this setting and cannot turn it off, and leaving it on may create PIDs unintentionally.
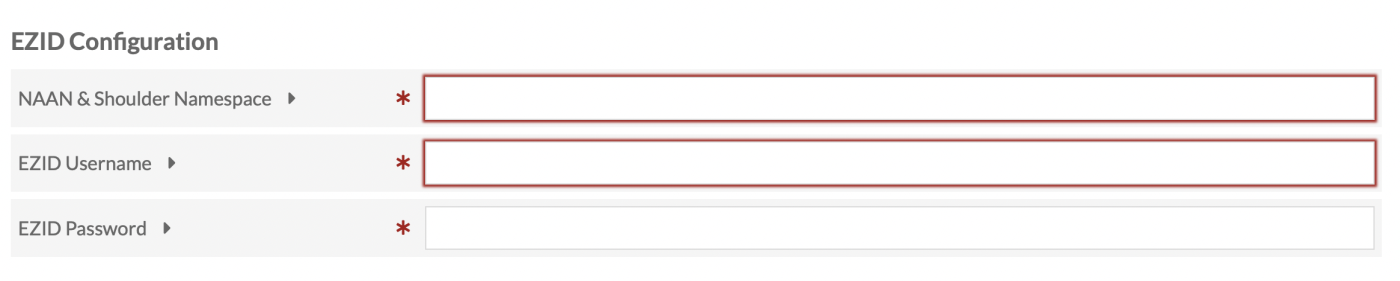
EZID configuration
The configuration process for EZID requires:
- NAAN & Shoulder Namespace: The Name Assigning Authority Number (NAAN) and ARK shoulder value uniquely assigned to an organization, which will appear in every ARK generated.
- EZID Username: The EZID user who has permission to create and update identifiers for the above namespace.
- EZID Password: The password for the above EZID user. Note that for security reasons this password doesn't persist in the form, so if changes are made to the NAAN & Shoulder Namespace or EZID Username you must also re-enter the password before pressing "Submit".
DataCite configuration
The configuration for DataCite requires:
- Repository DOI Prefix: The prefix assigned to an institution's DOI minting and management repository.
- DataCite Repository ID: The unique identifier assigned to an institution's DOI repository.
- DataCite Password: The password associated with the above DataCite Repository ID. Note that for security reasons this password doesn't persist in the form, so if changes are made to any field on the DataCite Configuration screen, you must also re-enter the password before pressing "Submit".
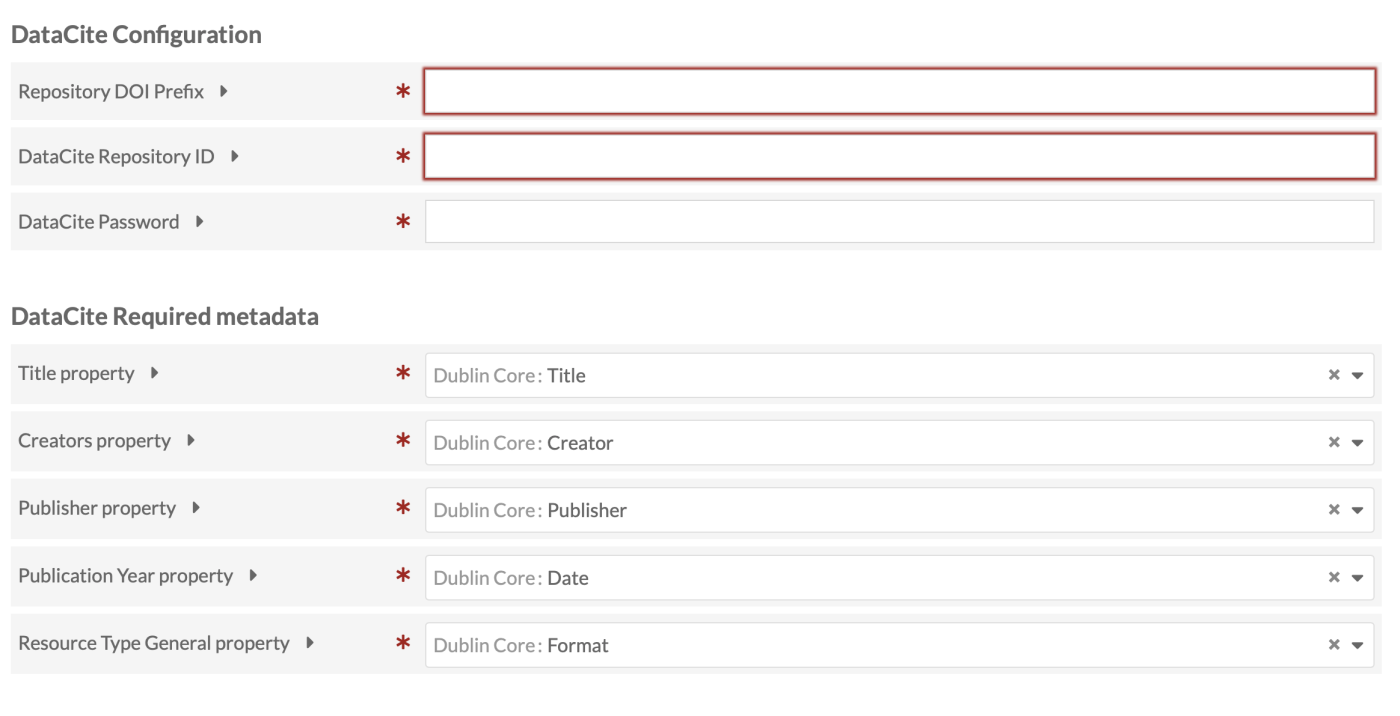
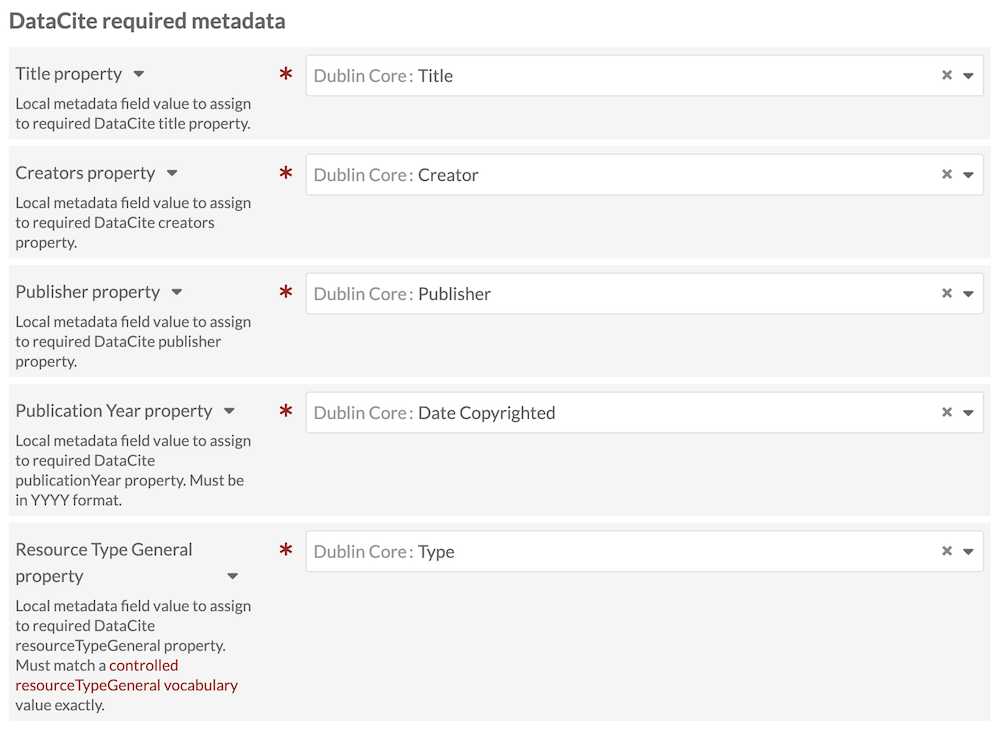
DataCite required metadata
DataCite requires five descriptive metadata values in order to generate a DOI: Title, Creator, Publisher, Publication Year, and Resource Type.
All of these fields must be mapped to an existing metadata field that you select from the list of available vocabularies in your Omeka S instance. The "Resource Type General" property must conform to a ResourceTypeGeneral controlled vocabulary value exactly.
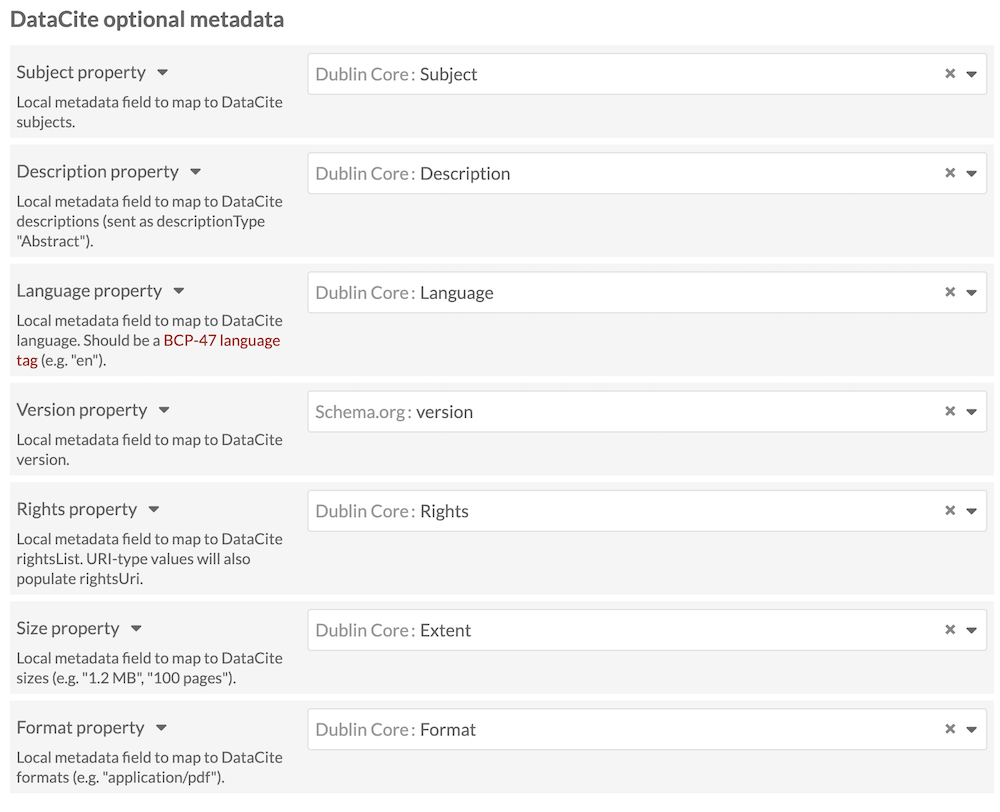
DataCite optional metadata
DataCite allows further fields for optional metadata. Map any or all of the following: Subject, Description, Language, Version, Rights, Size, Format. Note that "Language" requires a BCP-47 language tag.
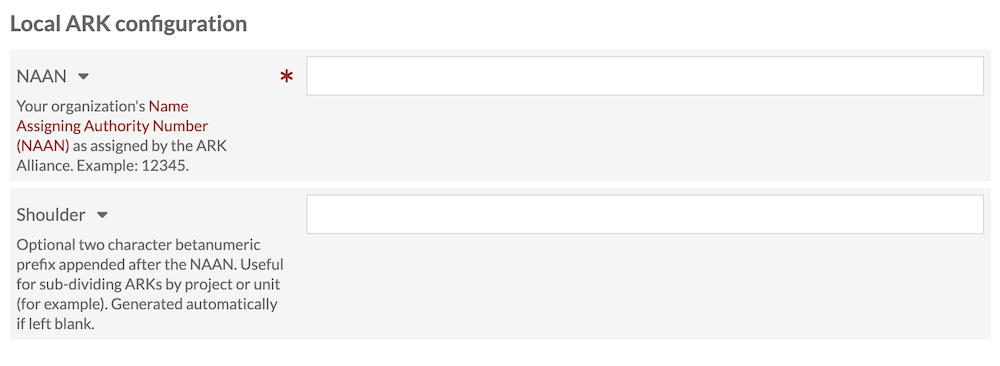
Local ARK configuration
To generate ARKs locally, you will need to request a (free) Name Assigning Authority Number (NAAN) using the Ark Alliance's NAAN request form. For more information, see the ARKS website page about getting started. This will generate stable permanent links using the Name-to-Thing resolver service, in the form "https://n2tn.net/[ARK]`.
In the module, provide information from your NAAN registration,
- NAAN: Your organization's Name Assigning Authority Number (NAAN) as assigned by the ARK Alliance.
- Shoulder: Optional two character betanumeric prefix appended after the NAAN. Useful for sub-dividing ARK by, for example, project or unit. Generated automatically if left blank. The shoulder can also be changed in the future, or re-generated by clearing the field, to support multiple shoulder sub-divisions.
Once generated, these locally-minted ARKs should immediately resolve to a stable, generic, site-agnostic landing page for its corresponding Omeka resource, complete with metadata and any media. Example: http://n2t.net/ark:/99999/ABC123456789.
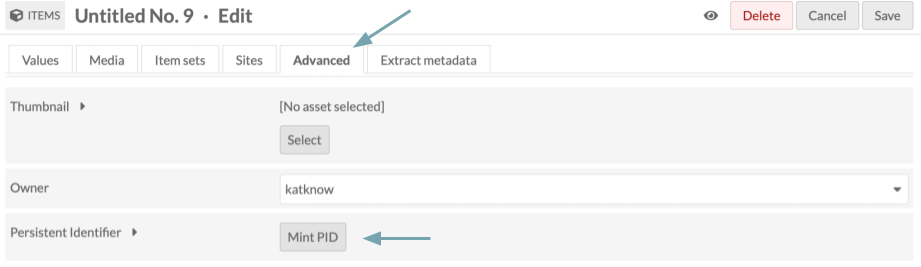
Mint PIDs
To mint a PID from the item editing page, navigate to the Advanced tab and click "Mint PID."
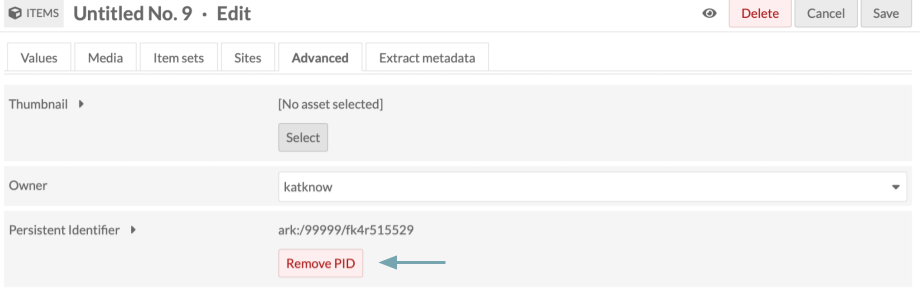
After a few moments, the ARK or DOI should appear.
The "Mint PID" button should now be a "Remove PID" button. Click there to remove the PID if desired.
If you select "Remove PID," a drawer will open on the right warning you that this will remove the PID and break any incoming links. Click "Confirm Remove PID" to delete the PID.

Click "Save" before navigating away from the page when both minting and removing PIDs.
Batch actions
You can batch-edit PIDs from the Items page. Select the items you wish to edit, then proceed to the batch-editing screen.
Near the bottom of the screen, you should see a Persistent Identifiers row. Here, you can "mint" or "remove" PIDs for all selected items. If you are batch-editing other fields and would like PIDs to remain unaffected, you can select "[no action]".
![Batch edit items screen, with fields from a number of modules. Near the bottom is a "Persistent Identifiers" entry with three radio button options - "Mint PIDs", "Remove PIDs", and "[No action]". A blue arrow points to this entry.](../modulesfiles/PID_batchoptions.png)
When you have made all desired edits, click "Save" in the upper right corner.