Users
User accounts in an Omeka S installation allow your staff and audience to do things like add items, make and moderate submissions, upload media, create virtual exhibits, and edit metadata.
User roles set at the installation level are separate from site-specific user roles. A user must be created for the installation and then given site roles. This allows you to give minimal installation-wide permissions to someone who will be drafting and publishing a virtual exhibit as one single site.
Administrators manage and create users from the Users section of the main administrative dashboard (with the head and shoulders icon). The Users section displays the user’s email followed by full name in parentheses, as well as their role and the date the account was created.
There are six user roles in Omeka S:
- Global Administrator: full installation privileges.
- Supervisor: robust site and content privileges.
- Editor (Content Expert): full privileges for content creation.
- Reviewer: robust content privileges but can only delete own content.
- Author: create own content.
- Researcher: search and read privileges only.
Behind the scenes, role values use the following slugs:
global_adminsite_admineditorreviewerauthorresearcher.
One example of how you may wish to manage the users of your site:
- A Global Admin user who installs, manages, and upgrades the modules and themes, and controls fundamental installation settings and server utilities.
- A Supervisor who manages user accounts on the installation and sites.
- One or more Editors who are responsible for the design and management of items, item sets, and resource templates.
- Reviewer staff members who are responsible for manually adding digitized or collected items and describing them according to institutional guidelines, and editing the additions of others.
- Authors who can add and edit their own items, and who are also given site-specific permissions to create exhibits and publish their research using items in the collection.
- Researchers who can be given site-specific permissions, but cannot add items.
Remember that these roles are separate from the user roles assigned at a site-specific level, which allow registered users of the installation to have site access to build exhibit pages.
Create a user
Only Supervisors and Global Administrators can create, edit, and delete users.
To create a new user, select the "Add new user" button in the upper right hand corner of the Users section in the administrative dashboard.
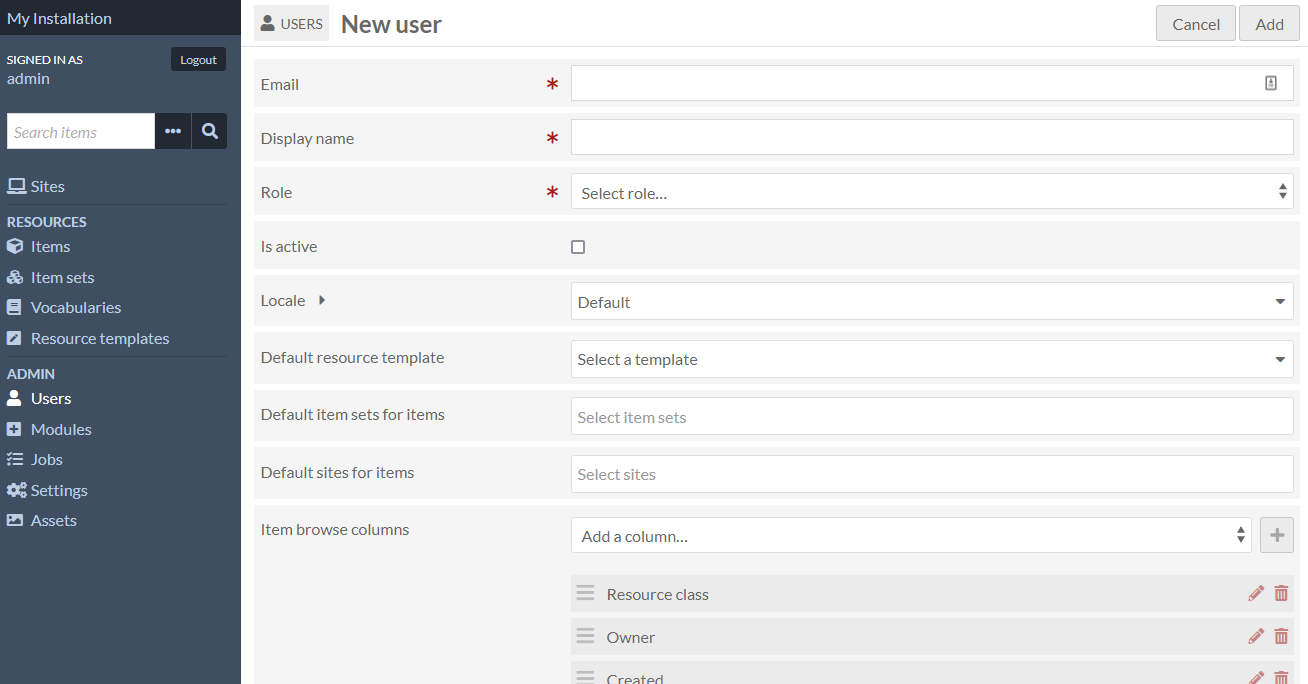
On the Add User page, enter the following:
- Email address
- Name (full name or a display name)
- A Role from the dropdown menu (see above for user role privileges)
- Check the Is active box to confirm that the user is active. A user who is inactive cannot log in.
You also have the options to customize a number of other settings; see below for more details on user settings.
The user is then sent a notification email to set up their account & password. The email will appear to come from what is set as the Administrator email in the General settings of the installation. Each email will expire 14 days after being sent. If the email expires, an administrator can manually set up a user's temporary password and email them.
Greetings!
A user has been created for you on Omeka at [website]
Your username is your email: [email]
Click this link to set a password and begin using Omeka S: [website unique link]
Your activation link will expire on [date and time]. If you have not completed the user activation process by the time the link expires, you will need to request another activation email from your site administrator.
Note
If you are having problems sending emails from your Omeka S installation, check with your hosting provider. Some hosting setups may require that the domain name for the administrator email matches the domain name of the installation (if your domain is yourinstall.org, the administrator email must be user@yourinstall.org). Omeka S relies on the server’s underlying sendmail utility for sending email; see the Mail section on the Configuration page for more information.
Manage users
To manage an existing user, go to the Users section.
All users can edit their own information using this screen, and can see other users of the installation (and their email addresses). Only Supervisors and Global Admin can edit other users.
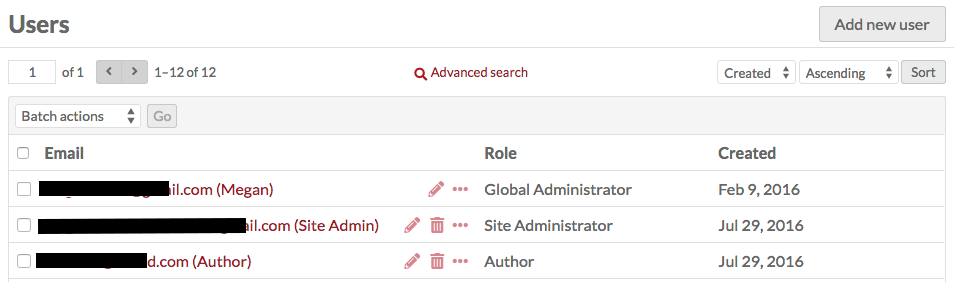
To see the items and item sets owned by a user, click the ellipsis located between the delete (trash can) button and the user role label. This will open a drawer on the right side of the screen with this information; you can click on the number of items or item sets to browse the items or item sets created by that user.
Edit user
To edit a user’s information, change their password, or access their API keys, go to the Users section. Find the user on the table and click the edit (pencil) button on their row in the table.

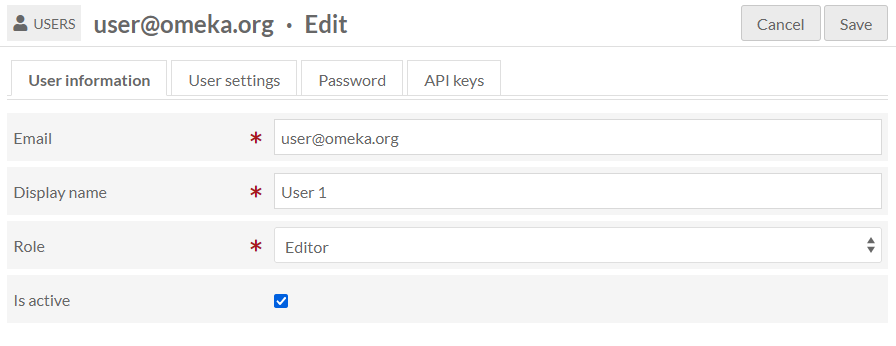
The Edit User page has four tabs: User information, User settings, Password, and API keys. After making changes on any of these tabs, be sure to click the save button in the upper right hand corner of the browser window. At any time you may cancel your edits by clicking the cancel button next to the save button.
User information
On this tab, you can edit the display Name and Email for the user, select or change the user Role and click the checkbox to confirm that the user Is active (or uncheck the checkbox to render the user inactive). A user who is made inactive will be immediately logged out.
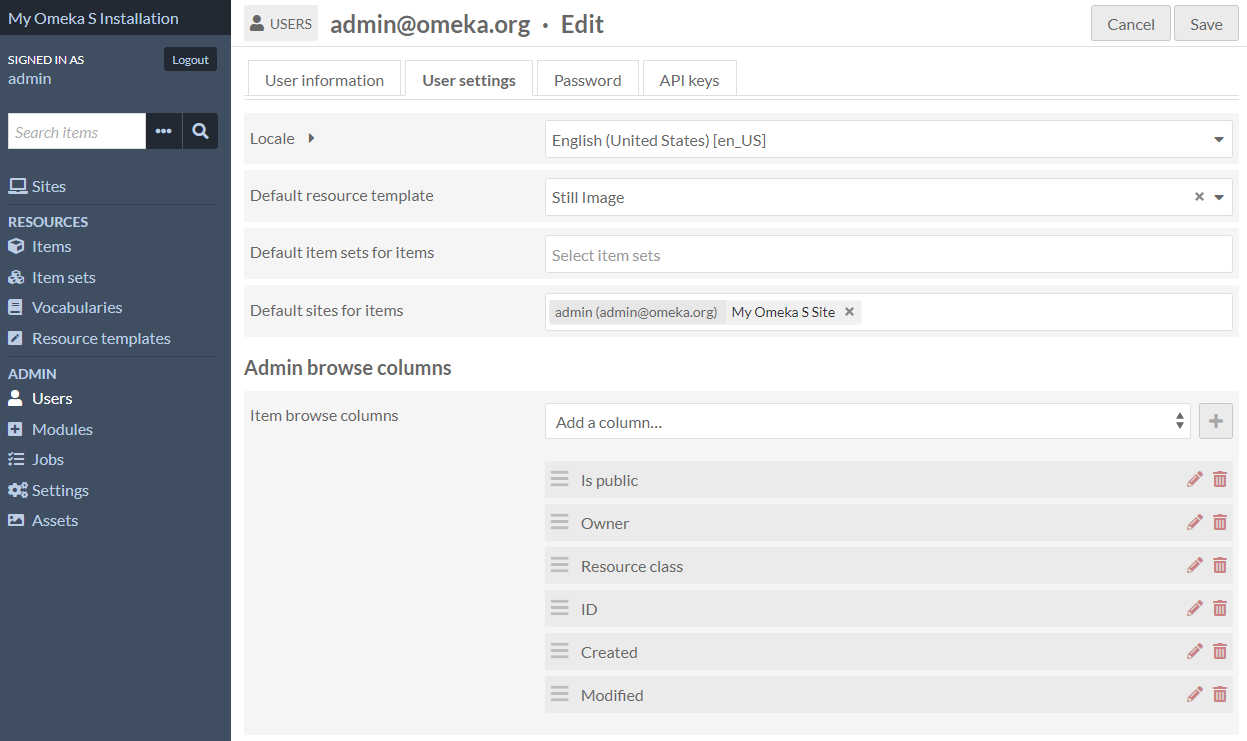
User settings
This tab allows a user or global admin to set the following:
- Locale: select from a dropdown of available languages. This will change the language of the installation's admin & public interfaces for that user. (This depends on how many interface strings have been translated. Untranslated strings default to English.)
- Default resource template: select from existing templates to have a template auto-load whenever the user creates a new item. The item will have the class associated with the chosen template.
- Default item sets for items: select from available item sets to automatically attach new items to the set(s) when created by the user. The item set must be open to new items in order for this setting to apply. The user will be able to remove their items from these item sets.
- Default sites for items: select from available sites to automatically attach new items to the site(s) when created by the user. Setting this will not give the user a site-specific role. The user will not be able to remove their items from these sites (unless they also have site-specific permissions).
- Admin browse columns: set custom views for administrative dashboards for this user. See below for more details.
Admin browse columns
Users can decide which columns of information form their resource browse views within the administrative interface. This can be useful, for example, if a user is auditing & improving a particular field for a large number of items, or comparing information between two or more fields.
Columns can be added, deleted, and reordered. To add a column, select it from the available dropdown menu, then press the plus sign button (+) to the right of the dropdown.
Most metadata fields can be added by selecting "Value" from the dropdown, and then choosing the precise vocabulary property from the drawer that opens on the right. You can have any number of Value columns.
Columns may be reordered by dragging and dropping, and they may be deleted by clicking the delete button (trashcan icon).
The views have the following default columns:
- Item browsing columns:
- Title (unchangeable)
- Resource class
- Owner
- Created (item creation date).
- Item set browsing columns:
- Title (unchangeable)
- Resource class
- Owner
- Created (item creation date).
- Media browsing columns:
- Title (unchangeable)
- Resource class
- Owner
- Created (item creation date).
- Site browsing columns:
- Title (unchangeable)
- URL slug
- Owner
- Created (item creation date).
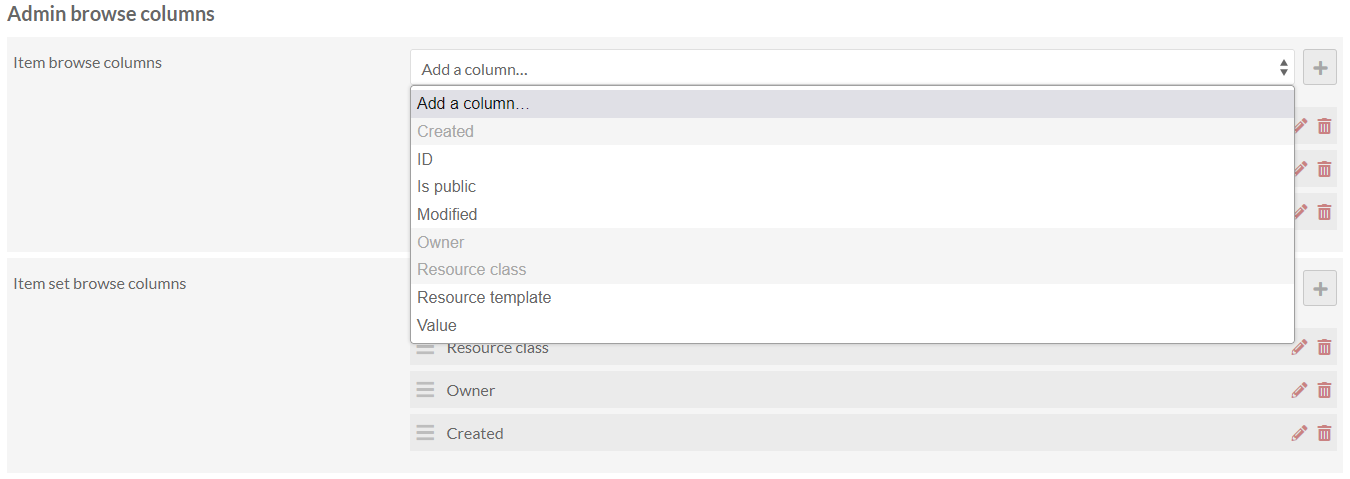
Available browse columns include:
- Item browse columns:
- ID
- Is public
- Modified (item last-modified date)
- Resource template
- Value(s).
- Item set browse columns:
- ID
- Is open
- Is public
- Modified (item last-modified date)
- Resource template
- Value(s).
- Media browse columns:
- ID
- Is public
- Media type
- Modified (item last-modified date)
- Resource template
- Size
- Value(s).
- Site browse columns:
- Is public
- Modified (item last-modified date)
- Theme.
When your column selections are saved, the user will be able to see the custom browsing views when they go to Items, Media, Item sets, or Sites:
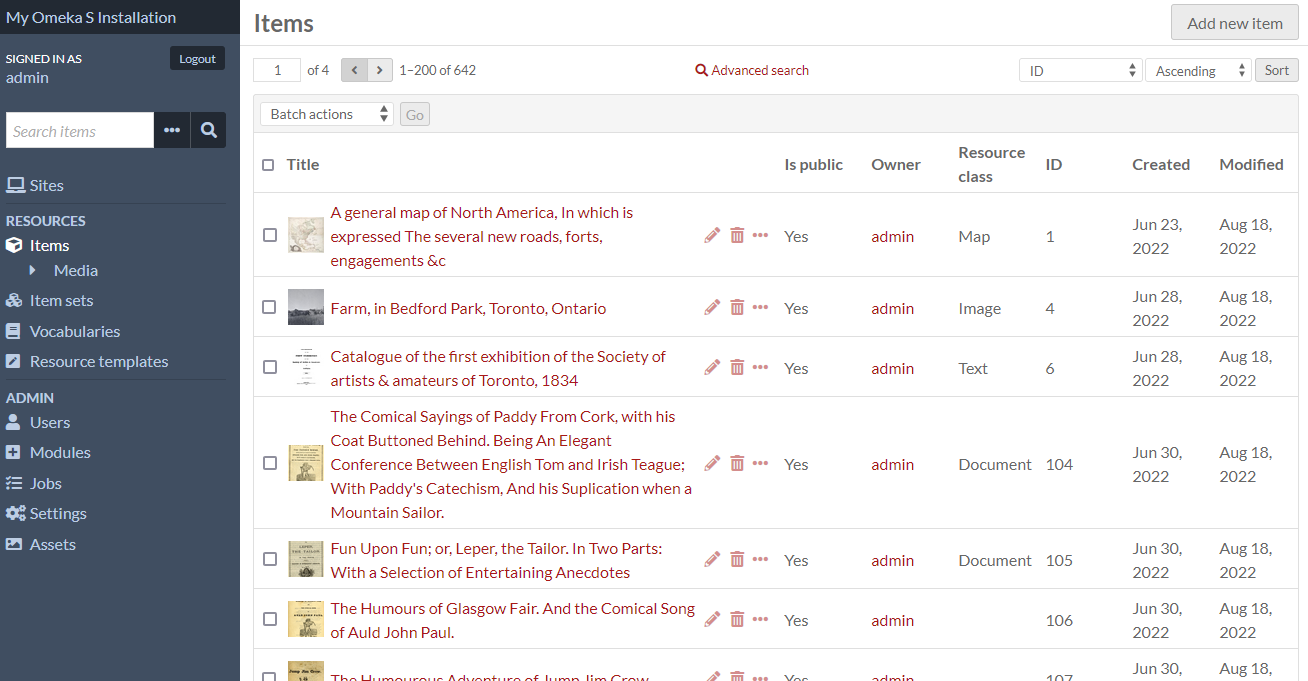
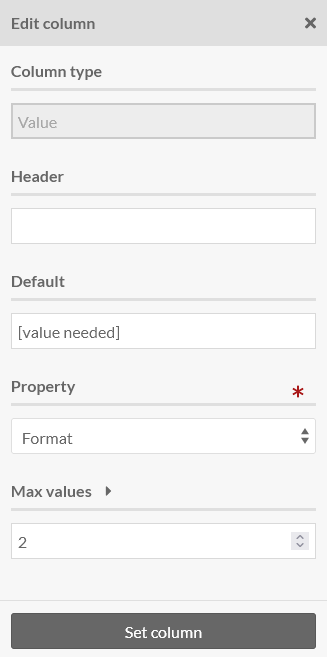
Each column is edited by clicking the pencil icon, which will expand a drawer to the right. There, users may fill in the "Header" text field to override the default heading for the column (for example, "Identifier" in place of "ID").
The "Default" text field allows a user to decide what information displays in a column cell if there is no data available. Usually these cells are empty, but you could use this to display, for example, "[null]" instead, if you were looking for cells that contain only spaces or other invisible characters.
When editing the "Value" column option, users will select a property to add as a column (required), and can also set the maximum number of values for that property to display in the column (optional).
You must click "Set column" before saving the page to ensure your edits are not lost.
Admin browse defaults
In addition to setting the columns that will be visible in the resource browsing interfaces, a user can set the default sorting column for each browse. Users may select a column to sort the results by, and choose between an ascending or descending sort order.
You will need to save your browsing column changes first, then return to this page to select a default column for sorting from the current choices.
Password
On this tab, create a new password. It must be entered twice, in both the New Password and Confirm New Password fields, to save properly.
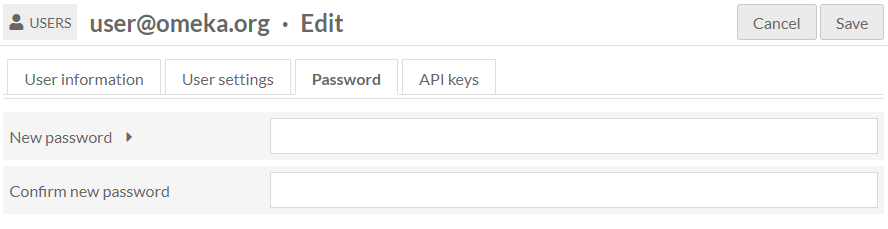
To see the password requirements, click the arrow next to the New Password field. This will display a list of requirements if any have been configured.
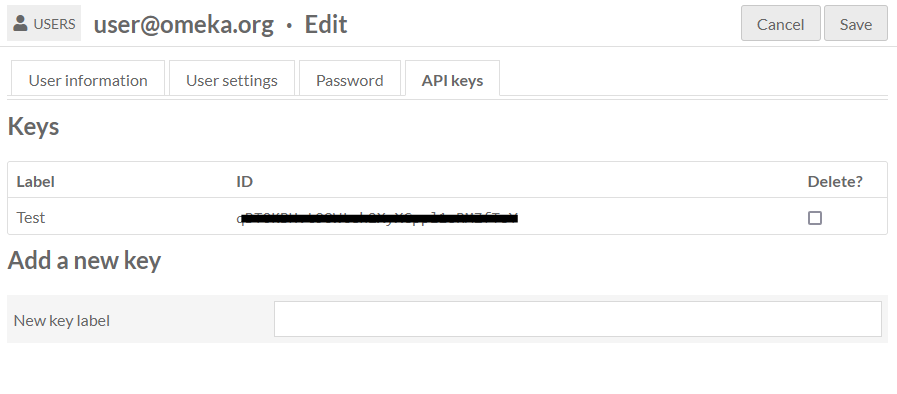
API keys
Use this tab to generate an API key for the user. To generate one, you must provide a label for the key - this could be a date or the purpose of the key. Save the page to generate the key.
To remove existing API keys, check the "Delete?" box on the row for that key and click "Save".
Delete user
On the User page of the administrative dashboard, click the trash can icon in the user’s row, to the left of their role information, to delete the user. Confirm the deletion in the dialog box which will appear on the right of the screen.
Batch editing
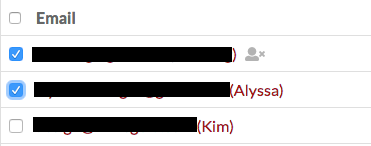
Supervisors and Global Administrators can edit multiple users at one time. Use the batch-actions dropdown to edit all or delete all, or use the checkboxes to the left of each user's email in the User table to select individuals to batch-edit or batch-delete.
You can also select all using the box at the top of the table.
The dropdown just above the table offers the following options:
- Edit selected (users)
- Edit all (users)
- Delete selected (users)
- Delete all (users).
To edit only the users whose checkboxes you have ticked, choose "Edit selected" from the dropdown and then click "Go". You will be directed to the Batch Edit Users page.
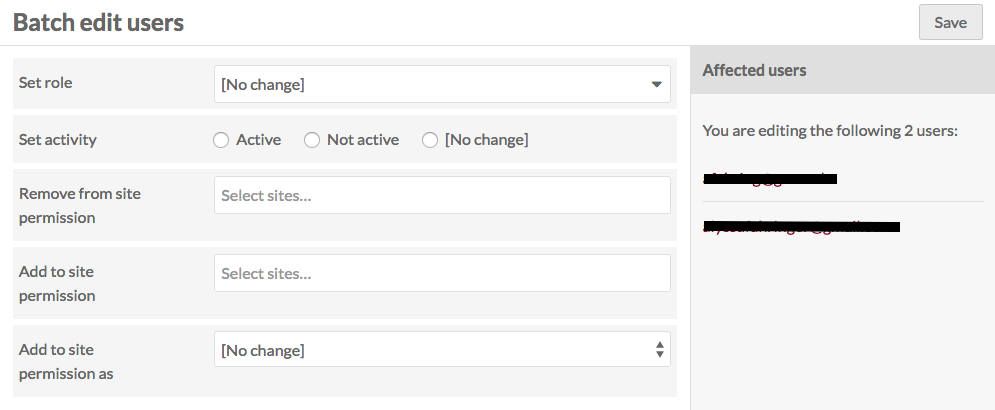
On the right side of the page are the emails for the users you are editing and to whom any changes you make will be applied.
On this page you can:
- Set role: select from a dropdown of all roles (see below) to change the role for all selected users.
- Set activity: set selected users as active, not active, or no change.
- Remove from site permissions: select from a dropdown menu of the sites on the Omeka S install, or use the option "all sites" to remove the selected users from all sites.
- Add to site permissions: select from a dropdown menu of the sites on the Omeka S install, or use the option "all sites" to add the selected users to all sites.
- Add to site permission as: a dropdown with options for viewer, manager, or creator - select which role the users will have on the sites to which you have added them.
Once you are done, save your changes.
If you choose "Edit all" rather than "Edit selected" you can apply changes to all users - excluding yourself - on the Omeka S installation. Use this feature carefully!
Batch deleting users
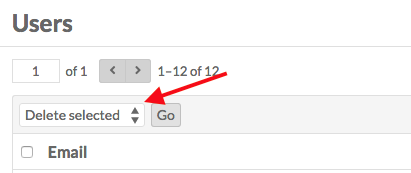
To delete a number of users at once, click the checkboxes next to their names on the Users table.
From the dropdown menu just above the email column, select "Delete selected" and click "Go".
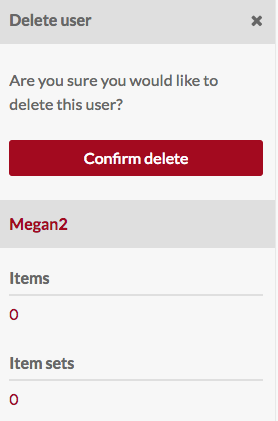
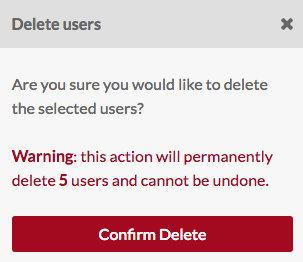
This will open a drawer on the right side of the screen with a message telling you the number of users you are about to delete. This action cannot be undone.
To permanently delete these users, click the red "Confirm Delete" button. To cancel, click the "X" in the upper right corner of the drawer.
The "Delete all" action in the dropdown will delete all users excluding yourself. This action cannot be undone and should be used with extreme caution.
To permanently delete all users, you must check the "Are you sure" box before clicking the "Confirm Delete" button. To cancel, click the "X" in the upper right corner of the drawer.
Roles and permissions
The following is a detailed breakdown of permissions for each user role:
| Category | Permission | Global Admin | Supervisor | Editor | Reviewer | Author | Researcher |
|---|---|---|---|---|---|---|---|
| Items & media | Add | Yes | Yes | Yes | Yes | Yes | No |
| Edit | All | All | All | All | Their own | No | |
| Delete | All | All | All | Their own | Their own | No | |
| Value annotations | Add/Edit | Yes | Yes | Yes | Yes | Yes | No |
| Item sets | Add | Yes | Yes | Yes | Yes | Yes | No |
| Edit | All | All | All | All | Their own | No | |
| Delete | All | All | All | Their own | Their own | No | |
| Vocabularies | Import | Yes | Yes | No | No | No | No |
| Edit/Delete | Yes | Their own | No | No | No | No | |
| Resource templates | Add | Yes | Yes | Yes | No | Yes | No |
| Edit/Delete | All | All | All | No | Their own | No | |
| Private objects | View | Yes | Yes | Yes | Yes | No | No |
| Users | Add | Yes | Yes | No | No | No | No |
| Edit | All | All | Themself | Themself | Themself | Themself | |
| Delete | Yes | Yes | No | No | No | No | |
| Modules | Install/Configure | Yes | No | No | No | No | No |
| Use | Yes | Yes | No | No | No | No | |
| Jobs | View | Yes | Yes | No | No | No | No |
| Settings | View/Change | Yes | No | No | No | No | No |
| Assets | View | Yes | Yes | Yes | Yes | Yes | Yes |
| Edit | All | All | All | All | Their own | No | |
| Delete | All | All | All | Their own | Their own | No | |
| Sites¹ | Create | Yes | Yes | Yes | No | No | No |
| Edit/Delete | All | All | Their own | ||||
| Site user roles | Modify | All | All | Their own |
- Often, a Global Admin, Supervisor, or Editor will create sites and then assign managers and creators from among the users (for example, a class assignment, or virtual exhibits by staff members). Site ownership cannot be re-assigned to other users, and a site owner always has manager-level access to sites they own, even if their installation-wide role is changed. Refer to the site users page for more information.
Global Admin
- Full privileges (create, edit, delete) of item, item sets, media, resource templates, site pages, sites, and users.
- Full privileges for modules - install, activate, configure, and use.
- Search, read, import, and delete privileges for vocabularies.
Supervisor
- Full privileges (create, edit, delete) of item, item sets, media, resource templates.
- Full power over all sites, including adding users, changing navigation and themes, using site-specific module utilities, and editing resources.
- Create, edit, and delete users at lower levels; cannot create other Supervisors or Global Admins.
- Use active modules that appear under the Modules sidebar category (such as CSV Import).
- View-only privileges for modules in the Admin > Modules tab.
- View-only privileges for vocabularies.
Editor
- Full privileges (create, edit, delete) of items, item sets, media, resource templates, and site pages.
- Can search, view, and create sites, and edit or delete sites they own.
- View-only privileges for vocabularies. Can see all logs.
- No access to modules, installation settings, or jobs.
- Can see other users of the installation and their email addresses, but not add users.
Reviewer
- Can search, view, create, and edit all items, item sets, and media. Can only delete those items, item sets, and media they own.
- No access to sites unless they have been added as a site-specific user.
- View-only privileges for vocabularies and resource templates. Can see all logs.
- No access to modules.
- Can see other users of the installation and their email addresses.
Author
- Can search, view, and create items, item sets, resource templates, and media. Can only edit or delete content they own.
- Cannot see objects marked private, unless the object is a site that they have site-specific permissions for.
- No access to sites unless they have been added as a site-specific user.
- Search and view privileges for vocabularies and sites. Cannot see other users' logs.
- No access to modules.
- Can see other users of the installation and their email addresses.
Researcher
- Search and view privileges for all public items, item sets, resource templates, and media.
- Cannot see objects marked private, unless the object is a site that they have site-specific permissions for.
- No access to modules.
- Can see other users of the installation and their email addresses.
Remember that a user at any role can be added to a site at any level (Viewer, Creator, Manager). This will determine whether, say, a Researcher-level user added to a site as Manager can see private information about that site.